Showing posts with label Mediterranean. Show all posts

Sunday, 20 July 2014

Home prepared herbal olive oil


There are few condiments and sauces that I cannot ever allow to run out at my home.
Asian line-ups are as you can imagine, but not limited to.
This is what I have to have all year around, one thing that I can't allow to run out.
A lot of shops sale herbal olive oil with the different spiced version, but in my opinion, homemade one is the best. You know what's in it, which kind of olive oil is in, and you can keep making it.
And the biggest difference, it is as fresh as you make!
I use the rosemary from my garden in summer, the taste of pleasure from my own home.

I lined up the ingredients in my favourite balance, but it's totally up to you what to include and how much in the bottle. Try to choose "hard" things (e.g. dried chili, condiments, nuts etc.) and better to avoid the ingredients easy to spoil (e.g. meat, fish, leaf salad etc) unless you meant to use up in once.

Ingredients:
1 stem rosemary
2 small bay leaves
1 small garlic clove
4-5 black pepper corn
1 garlic - pealed
about 10 fennel seeds

Method:
Just bottle it. You can feel the herbal flavour from the right next day.
Basically you don't need to replace the all things in the bottle every time, because the olive oil preserves the ingredients in the bottle quite well.
Point is, keep adding more oil to the bottle whenever you use more than the line of ingredients in the bottle and keep all things under the oil.
Rosemary leaves will come off from the stem but it will not going to get spoiled.
Yet, I do change them about once per about 5 times full refill usage.

This is just when I bottled it. Both the rosemary and olive oil are shinny green.


Then this is the next day, you can see that the rosemary green already started to melt into the olive oil and the oil has fresh rosemary aroma.

By the time, the taste will change to more mature and stronger flavour, and that's the another fun.
I use them for pizza dough, salad dressings, meat-sauces, pastas and more.
My latest best favourite way is, dipping a piece of freshly baked foccacio or crunchy baguette in the dish of this oil from the first 2-3 days with freshly clacked black pepper, sea salt and grated parmigiano cheese. This cannot be starter, because you can't stop eating it :-)

Saturday, 19 July 2014

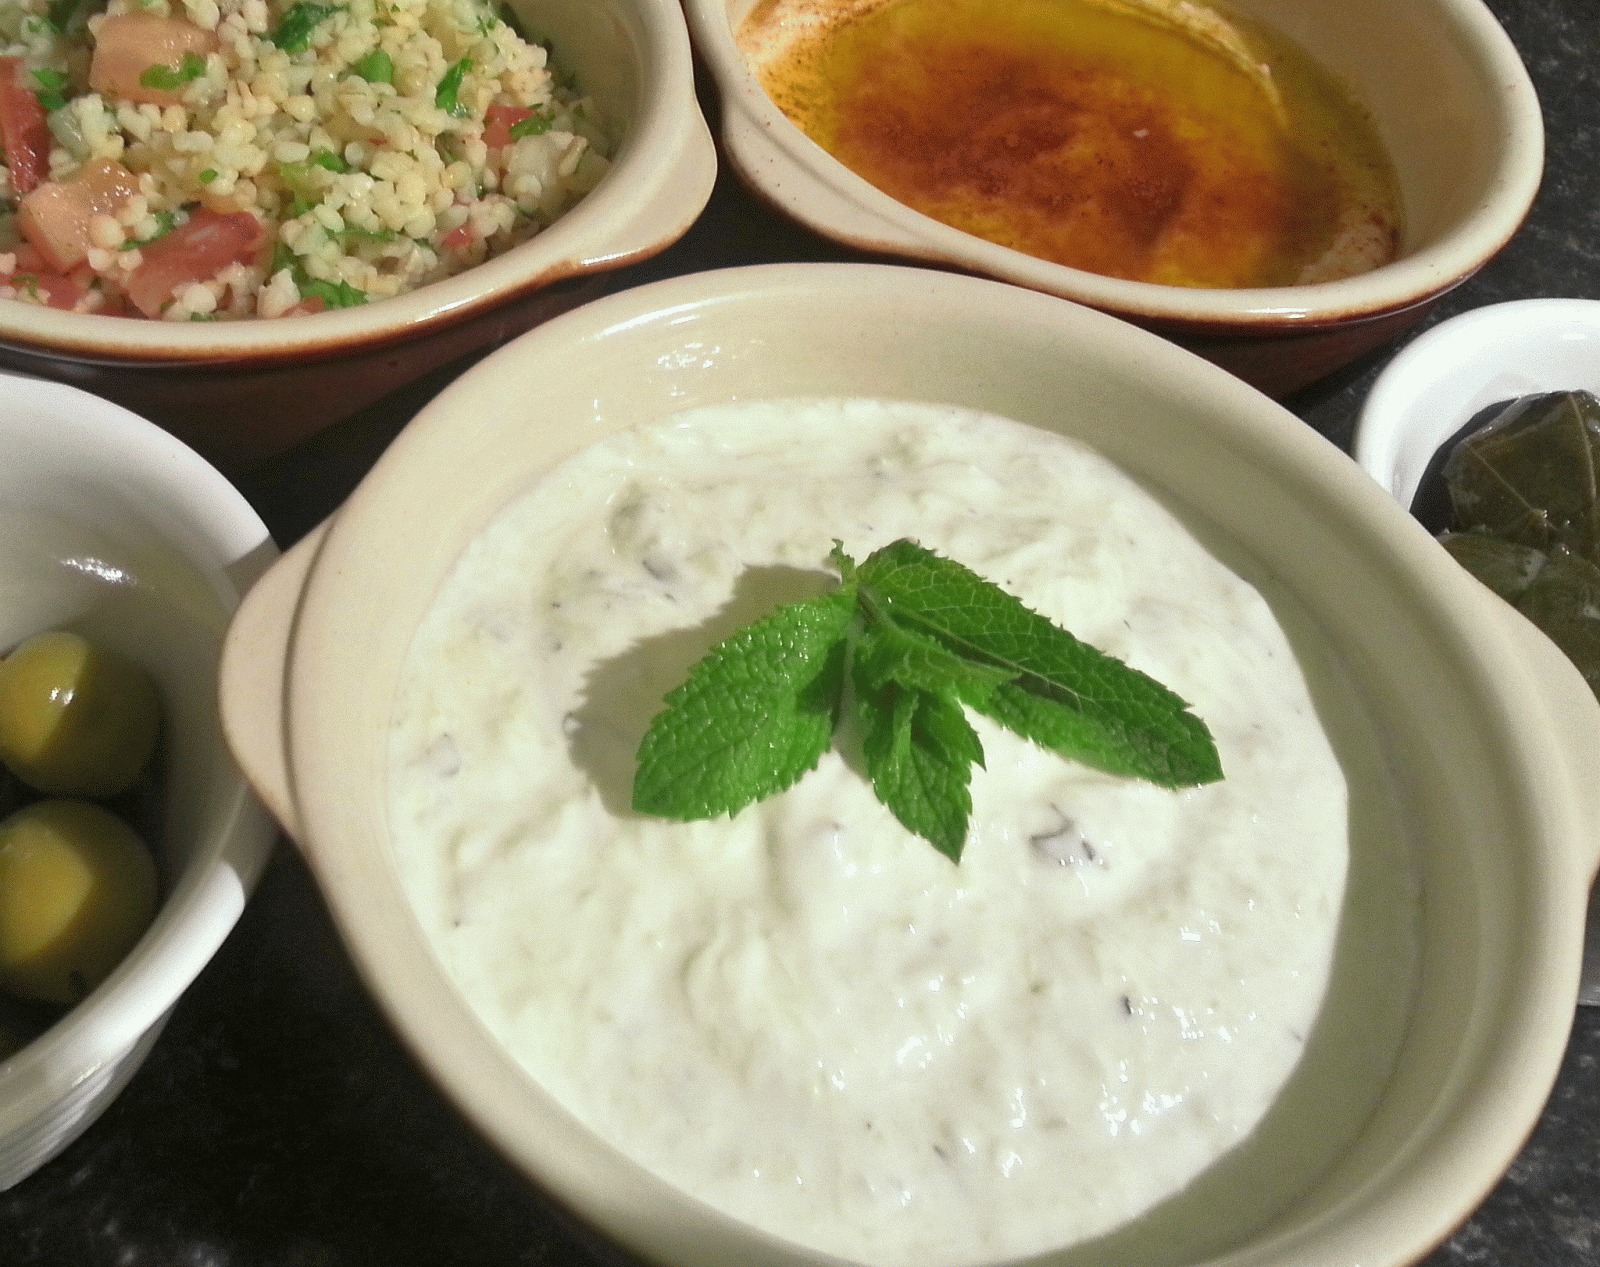
Tzatziki - Greek cucumber & yogurt cream


Tzatziki is the one thing I learnt before knowing the name of the dish.
There were excellent Greek restaurant in Pasadena LA, it was near to our home and we went there for all good occasions. So much great memories at the restaurant and it was with completely new type of taste for me at that time. I even never had an idea of using yogurt for cooking so at the beginning, I couldn't tell what even was the base of cream.
Once I moved UK, I realise that Greek food is not cheap here (or any eating out is not cheap compare to US), so my stomach forced me to learn all good taste I could recall.
So the recipe was from several books and people, but the taste adjusted to what I liked.
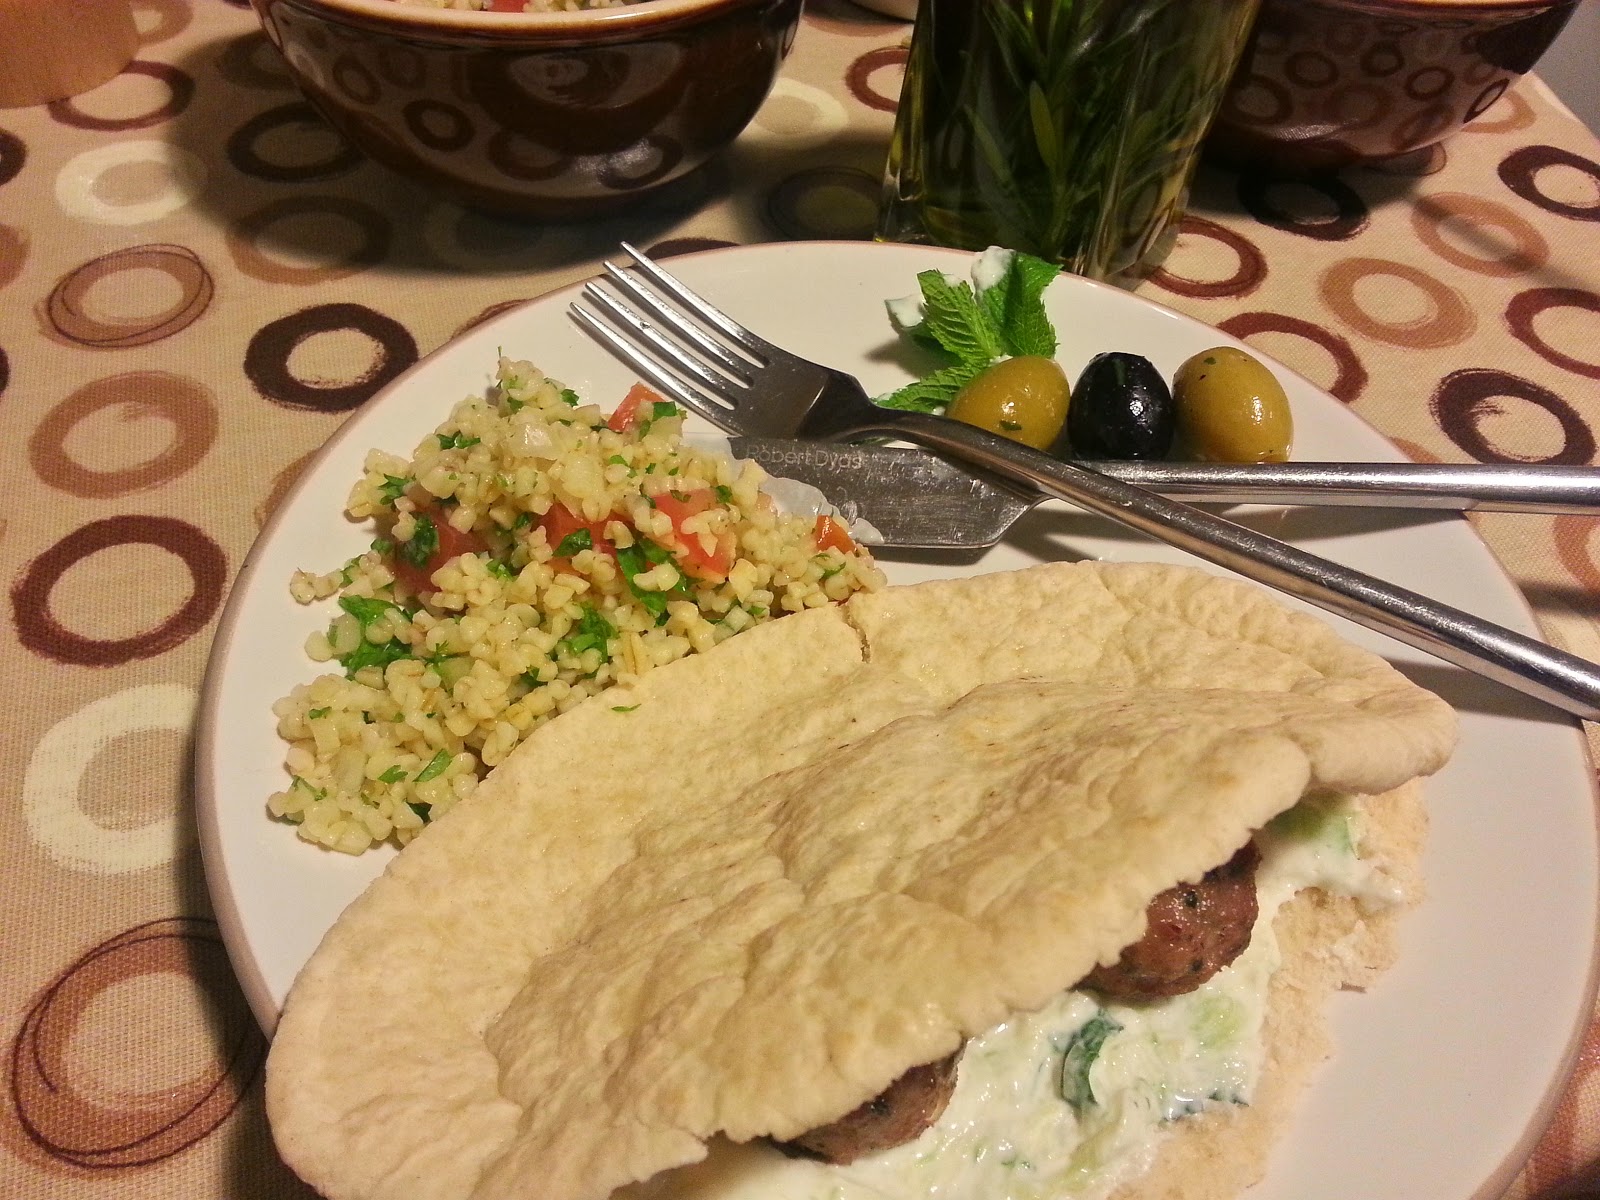
Nice to serve with all other great Greek foods especially with the oven grilled lamb meatballs in a pita bread.

Ingredients:
1 cucumber - skinned and grated
300g yogurt
1 garlic - crushed and chopped
about 5-7 leafs of mint - sliced and chopped
1/4 tsp salt
some black pepper as you like

Method:
1. Prepare the vegetables: cut in half and skin the cucumber until near the end (leaving a bit at the end allows you to hold the cucumber easier) then grate it with a grater (I use the one for grating the parmigiana cheese). Put it out on a strainer, squeeze them as much as you can to drain out all liquid.
2. Crush the garlic by a side of your knife, then chop it to very fine mince.
3. If you’ve got a bunch of mint, take only the soft leaves, wash it under water then drain the water out. I like the mint short thin strings in this cream, so once slice them all finely then turn it and chop them roughly.
4. Combine all in a bowl then keep it in the refrigerator for few hours.

5. Serve them with some grilled meat or fish; our favourite is to have some with the oven grilled lamb meatballs in a pita bread.

like this :-)

Sunday, 12 January 2014

My home-adapted-style Falafel

My adapted version of Falafel recipe. No deep fry and righter spicing.

Ingredients
240g (1 can) chickpea
1/2 small onion
2 garlic cloves crushed and chopped
about 1/4 cup flat leaf parsley (pick only leaf part)
1 tbsp flour
1 tsp smoked paprika powder
a pinch of grand cumin
a pinch of grand coriander seeds
a pinch of grand cardamon seeds
1 tsp salt

Method
1. Put all ingredients in a food processor, in the following listed order: the onion, garlic cloves, canned chickpeas, flat leaf parsley, flour, paprika powder, grand cumin, grand coriander seeds and grand cardamon seeds.
Start with staggering chop then push down the ingredients stack at the side of food processor, make sure there is no big bits remained but all processed well and the chickpea bits become about couscous size.
2. Take out all in a bowl then cover the bowl with plastic wrap. Keep it in refrigerate for 1-2 hours.
3. The mixture should become slightly tough and easier to deal with after keeping in refrigerator. By a table spoon, Scoop enough amount of mixture out from ball, make a small ball on your palm. Not like meet ball as it is much easier to break into pieces, like to put them together in a round shape. Place them on a backing tray, which has covered with aluminium foil and and spread a little amount of olive oil. Keep them apart each.
4. Splay or splash very little amount of olive oil on top of each balls.
5. Place the tray in oven heated at 200c, back them for about 15 to 20 minutes until the top of the balls become brown, then turn them over (it may stack to foil, then use spoon to move them like scraping the bottom) keep it in oven for another 10 min until the top become golden.
6. Serve them hot with warm pita breads.

This recipe is based on a very nice recipe with pictures at below web site:
http://theshiksa.com/2011/01/05/falafel/


Friday, 10 January 2014

Home made Humos

This is a recipe based on many other people's recipes, adjusted to the taste that I really liked when I tried it in a nice small Lebanese restaurant.

Ingredients
1/2 can (200g) of chickpea drained
juice of about 1/2 lemon
2 Tbsp of tahini paste (or sesame paste) - measure without oil
2 cloves of garlic
about 1/4 cup of extra-virgin olive oil (or more depends on how it goes)
small pinch of ground cumin
salt and black pepper
some paprika and extra-virgin olive oil for garnish

Preparation
 This is most painful part. Usually, canned chickpeas have a thin skin wrapping each piece.
After draining the chickpeas, rinse them and peel off the skin one by one.
They usually has a slit so if you hold a piece between your fingers and push a bit, it should be peeled off very easily. Discard the skins.

Method
1. In food processor, put the garlic cloves and mince it well.
2. Reserve few chickpeas for garnish, put  the rest of all chickpeas in the food processer then blend them until smooth.
3. Add the lemon juice little in once and blend them, gradually add all the juice in. Check the taste time to time and make sure the puree doesn’t get too sour.
4. Put the tahini paste and cumin in the food processer then blend them until they are mixed well.
5. Add the olive oil little in once and blend them, keep adding the oil until the puree gets to the smoothness and softness you like.
6. Add some salt and black pepper to your taste.
7. Pour the humos mixture into a dish/small bowl, make the humos shallow sloop down to the center of the dish. Pat some paprika around the center, put on the reserved chickpeas, then pour over the extra-virgin olive oil to cover the top of humos - so the humos gets intact from air and remain smooth.