Showing posts with label Japanese. Show all posts

Monday, 8 February 2016

肉団子 - Chinese style meatball


The Chinese meatball I titled it because so I believed when I was in Japan, but I've never seen them in Chinese restaurant... May be it's a Japanese invented Chinese like food?
Anyway, it's really tasty. Sweet say sauce dressing thickly cover over meatballs, well coated like a shell, but the inside is full meat taste, juicy and hot. Unstoppable.

Ingredients for 4 people:
 for meatball
   - 1kg minced pork   
   - 2 tsp minced garlic
   - 1 tsp minced ginger
   - 1 tsp sesame oil
   - 1 tsp salt
   - 1 Tbsp sake
   - 1 Tbsp soy sauce
   - 2 tsp potato starch
  
- 1 onion
- a bunch of green leaf vegetable such as Choi-Sum, Pak-Choi, Broccoli etc.

 for sauce
  a. 1/8 cup of Shal Hsing (Chinese liquor)
  a. 1/4 cup soy sauce
  a. 1/2 cup water
  a. 3 Tbsp sugar
  a. 1 Tbsp potato starch 

  - 2 tsp rice vinegar or good white wine vinegar 
  - 1 Tbsp sesame oil 

  b. 1 tsp minced garlic
  b. 1 tsp minced ginger
  b. 1 tsp minced red chili
  b. 1 Tbsp minced leek


 - some flour to coat meatballs
 - enough vegetable oil for deep fly
 - a kettle of boiled water + a pinch of salt for green leaf veges

* A Chinese wok or a deep and large flying pan.
* 2 metallic strainers
* One large slotted spoon - metal one is better
* One wooden spoon. 
* A pair of cooking chopstick is nice to have.

* Steamed rice to go with

Method:
1. Put a kettle of water to boil. Put all a. sauce ingredients in a bowl together, mix them well. Put a metal strainer on an empty sauce pan (large enough to drain all oil from wok), put a kitchen paper on the strainer and set a said. Cut an onion into quarters,  peel them in few layers each, then cut them into about 2-3cm square pieces. Prepare a small bawl or plate with some flour (about half a cup should do). Wash well and cut green veges into about 5 cm length (if broccoli, separate them in to single blanches)
2. Put all meatball ingredients in a large bawl then mix them by your hand for about 3 minutes.
3. Make them into about a table-tennis ball size balls (a bit smaller than a golf ball if you don't know table-tennis ball...) in your hand (below picture shows a half of them).

4. Place a Chinese wok (or deep and large flying pan) on a hob with enough vegetable oil (well, no more than a half of wok for your safety. See the later picture).
5. Start heating the oil with medium-high heat. Good way to see the temperature is using a pair of cooking chopsticks made of bamboo; if the bubbles comes out from the chopsticks tips quietly when you put them into oil, that's about it. If bubbles comes out in rush then that's too hot, stop the heat for a bit of time. Or else, you can drop a little piece of minced meat; if the meat touch the bottom and gently comes up with bubbles, that's also good. Once oil gets enough hot, coat the prepared meatballs one by one with a thin layer of flour (rolling the balls in a tray or ball of flour), then drop in to the oil. (Don't put them too much in one -go; you may need to do in batches).
6. Once you put enough meatballs in, then don't touch but leave them until the top of balls start to change colour, about 5 minutes. Then using a large slotted spoon, scratch out all balls from bottom of wok. Stair them and turn them over wait for about 3 minutes.

7. Cooked meatballs will start to float. If difficult to see then wait until they start to get light blown like onion skins, and take them out to metallic strainer (the meatball colour gets darker after dry, like in below picture).

8. Once all meatballs are deep-flied, then put onion pieces in to the same wok next. Be careful for your hand! Onion cooks very quickly; as soon as bubble start to up around the onion pieces, you can scoop them out by a slotted spoon, drain as much oil as possible over the wok then put them on the meatballs on the strainer. Stop the heat.

9. Move the strainer aside (on a plate), then carefully drain the oil into the sauce pan where strainer was on. Clean the wok and put it back on a hob, fill it with boiling water from kettle, add a pinch of salt in. Turn the heat back to medium-high.
10. If the water start boiling again, put the green leaf vegetables in. Boil them just lightly until leafs start to change colour; about a minute if Choi-Sum or Pak-Choi, about 3 min if broccoli. Drain them out on another strainer.

Now the last part, all goes very quickly from here...

11. Put the wok back on a hob, put a table spoon of sesame oil, then toss all b. ingredients in the oil, then turn the heat to max. Stir them with a wooden spoon.
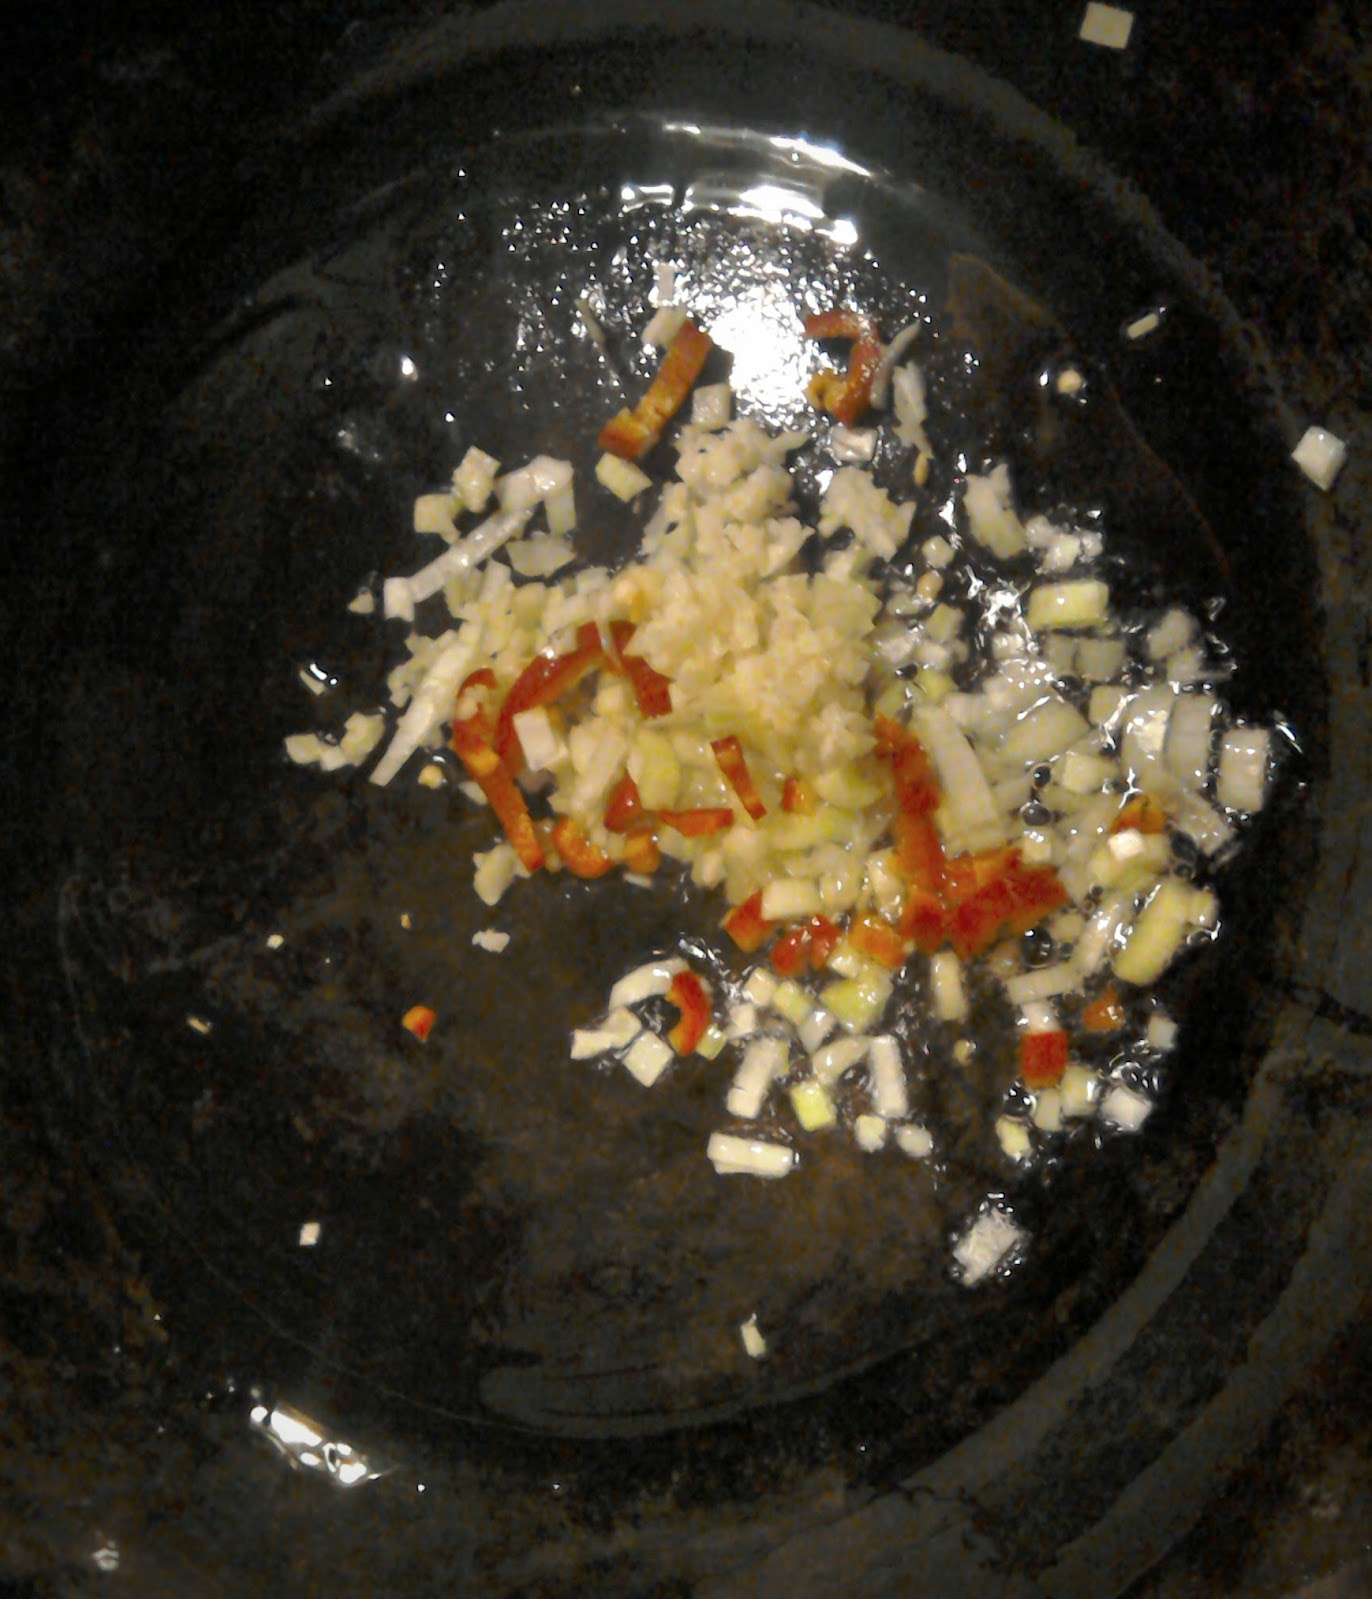
12. When some small bubbles come around minced garlic, mix the bawl of a. ingredients one more time then quietly pour that into the center of wok. Continue stirring the sauce by wooden spoon. Try scratching the bottom as it gets sticky from bottom. 

13. The sauce will get thicken by the potato starch in a minutes or so, then put all onions and meatballs back into the wok, quickly turn all thing in wok over by the wooden spoon while moving the wok back and forth. You will see it's ready when all meatballs get coated by the shinny sauce. Put them out to a serving dish.
14. Now place the wok back again on a hob, pour just a bit of water (like 1/4 cup) then place all green leaf vegetable in, stair fly them until all water to evaporate. Put the vegetable on a side of meatballs.


15. Serve them hot, go well with steamed rice.


Saturday, 23 January 2016

いなり寿司 - Inari zushi

I had a year break for updating my blog - with many reasons. Now I'll start again but not as frequently as I could do before.

Starting with one that quite simple - as long as you can make right sushi rice.


Inari zushi


Sushi rice wrapped in a deep fried tofu call "Oage", seasoned in sweet soy sauce flavor. 
Everyone like this.

Ingredients (for 12 pieces):
 - 6 slices of Oage (can be found in any Japanese glossary shop, usually packed in 2 or 3 and frozen)
 - 1/2 cup Men-tsuyu (can be found in any Japanese glossary shop, or you can prepare Vegan one following bellow section)
 - 1 cup water
 - Sushi rice (prepare following the linked page but summary of ingredients are below):
     - 3 cups short grain rice, Japanese, Korean or Chinese one
     - 3 T sake
     - water as needed (see detail in the linked page above)
     - 150 ml sushi vinegar or below a)
     a) 135 ml rice wine
     a) 90g sugar
     a) 30g salt

 * some hot water for cleaning oage

<How to prepare Vegan Men-tsuyu>
Men-tsuyu is a typical sweet soy sauce base sauce, used for eating soba, templa and many other Japanese cousins.
You can buy one in bottle at Japanese glossary shop like here, or you can make them at home.
Proper Men-tshuyu requires a proper dashi, made from konbu and dried fish flakes.
Since my mother in law is almost vegan, this recipe is complete vegan style.
Ingredients:
 - 1 thumb nail size cut of Kombu
 - 3 heap T sugar
 - 1 T sake (Japanese rice wine)
 - 1/2 cup soy sauce
 - 1/4 cup water

Put all in a sauce pan, leave it for 10 minutes, then gently boil them with melting sugar by medium heat. Take kombu once the sauce start to boil, then stop the heat.
I usually make in much larger quantity, bottle them and keep it in fridge - it can last for a month.
It is concentrated; you'll need to add some water if you want to use it for templa or soba.

<How to prepare Inari slices>
1. Usually, sold oage has too much oil remained in it, we need to clean them first. Cut the oage slices into 2 pieces, so you can make 2 bags from 1 slice, then soak them in a bowl of boiling hot water. You can use from freezer directly, it will melt in the hot water.
2. Carefully squeeze the hot water out from pieces, then pat dry each piece of oage between kitchen paper to take off remained oil and water out.
3. Place Men-tsuyu, water, and slices of oage in a sauce pan, start cooking in low heat, move them around, up and down to make all slices well cooked in the sauce until almost no sauce remain in the pan. Take them out on a plate and leave it to cool down.

<How to prepare Inari zushi>
3. Prepare sushi rice - see this page.
4. Carefully open every inari pieces as bags without breaking them. If inari doesn't open easily as a bag and this is difficult, then place the inari on cutting board or clean surface of kitchen table, roll over by a cooking pin (or any clean roll should do).
5. Place about 2 to 3 table spoon of rice in each inari, lightly pressed in to bottom of bag by the spoon, then fold to close the bag and place it up side down.
6. Serve it with slices of gari and soy sauce if you prefer.

Note: sushi rice gets really hard and dry taste once you keep them in fridge. Don't worry, Inari is tasty in warm too; place on a plate, cover by clingfilm, you can warm them in microwave for a minutes or so, then it will be back to same soft nice taste. Of cause you don't do this to the sushi with fish!

Home style Osechi 2016

Osechi is the meal for new year celebration, usually cooked through end of year and served to family and any guest visit home through the new year period.
Originally those needed to last for a week so seasoned quite salty.
Now a days its more for family gathering and healthier tasting.
And easy more, you can parches them as a box set in Japan.
But here in UK, I have to prepare all by myself...
Left: Inari sushi (sushi rice wrapped in a thin deep fried tofu seasoned in sweet soy sauce style)
 Right up: Kinpira gobo (Carrot, gobou root and mooli skin fried in kinpira style - sweet soy sauce and sesame oil) 
Right bottom: Kinpira renkon (lotus root in kinpira style)
Left top: Tezuna konnyaku (Konnaku potato jelly fried in spicy soy sauce taste)
Right top: kazunoko (Pacific herring roe seasoned with sweet soy sauce  taste)
Center: Tataki gobu (gobou root in sesame sauce )
Left bottom: Kobu-maki (Carrot and gobo root wrapped in Konbu)
Right bottom: Date-maki (fluffy egg roll)
Right top: Shime-saba (cured & marinated mackerel)
Left bottom: Nijimasu no sashimi (cured rainbow trout slices)
Left top/right bottom: Kouhaku kamaboko (kamaboko: fish cake slices)
Center: Ikurano no shouyu-zuke (Salmon roe seasoned with sweet soy sauce  set in Yuzu citrus cup)
Left: Namasu (mooli and carrot marinated salad)
Right: Kikka kabu (Baby turnip decoratively cut in chrysanthemum flower and marinated)
Nimono (satoimo umani, hana ninjin, kame shiitake, gobou umani, hourensou)
Kenchin
Left/right: Nishoku renkon (2 coloured lotus root slices flied in sweet rice vinegar)
Center: Kokabu senmai-zuke (cured thin sliced baby turnips)
Chirashi sushi
Left top/right bottom: Sakura mochi (sweet bean's paste wrapped in rice & flour pan-cake)
Right top: Kuri no amani (Chestnuts in syrup)
Anzu kan (apricot in Kanten jelly)
Few missed in photos:
Renkon no agebitashi
Nishoku tamago
Ebidango
Shigi dori.

Wednesday, 16 July 2014

ささ身のサラダ - Chicken breast salad


This salad is a long running favourite dish for our family, usually heavily routine through the hot summer. It can be nice nibble for serving with drinks, also quite adequate for serving as a main dinner plate on its own, or with some white steamed rice, especially during the hot summer days like now. It looks very simple, but the threaded chicken absorbs the fresh sauce and a hint of sesame oil invites you to eat more. Because you can leave it for overnight, it's nice for party and pot-luck-lunches.
My mom's original recipe uses threads of Zha Cai, is a spicy Sichuan pickles, but the Japanese adapted seasoning one (means not-so-spicy), which either not easy to find or very expensive even you find in here UK.
My recipe uses cucumber for replacement, and actually has gained the better response from my guests here.

Ingredients (3-4 people):
2 big slices or 3 small slices of Chicken breast
2 slice ginger
1 leek - green part only

4 x 5cm leek - white part only (about 5cm x 2 per each leek, 2 leeks)
1/2 cucumber
1tsp salt

6 Tbsp sushi vinegar
3 Tbsp soy sauce
1 Tbsp sesame oil
1/2 tsp sugar
some black pepper

Method:
1. Prepare chicken: boil the chicken breast with 2 slice of ginger (with skin but cleaned) and green part of a leek (cut of very end and clean the soil out under running water before use) for about 20-25 minutes, then leave them in the boiled water until all cool down.
2. Meanwhile prepare vegetables: we need 4 pieces of 5cm length white part of leeks, usually you can take up to 2 parts per one whole length. Take the most outside skin off if its not soft enough (US leeks may need to peal 2 skins off...) cut off the very ending with loots, then cut them in to 5cm length, slice them into thin julienne. If the leek is spicy as the one from Japan then you may need to soak it in a bowl of water for 5min before use.
3. Skin the cucumber, cut in half along with the length, take off the center transparent par will seed using either knife or spoon. Cut in to half width again, the slice them in about a half cm width slices.
4. Put all slices of cucumber in a small bowl, add the 1tsp salt and mix them well, then leave it for about 10min.
5. Put the cucumber slices on a strainer, wash out the salt under running water well, then grab a hand full of slices at once and squeeze out all water in your hand. Repeat that for all slices. Doing so, it will prevent making the salad soggy later, and keep the cucumber crunchy in the salad.
6. Prepare the sauce: just mix the listed ingredients well.
7. Once the chicken breast get cool down, then break them into few small pieces, and thread to the string one by one as thinner as your patient can handle. The thinner you can thread the better absorb the sauce and tastier later.
8. Mix the threaded chicken, julienne leeks, sliced and squeezed cucumber in a bowl roughly, then pour over the mixed sauce, mix the whole thing again.
9. Leave it in your refrigerator for at least 1 hour, even better if you can leave it for overnight before serve.

* If you can find a good Zha Cai  then you might want to try my mom's version; you firstly clean the Zha Cai out from soaked spicy juice well. If it is a whole one then slice it, and then cut it into threads. Soak the threads in a cup of water for 5 minutes and drain out the water before mixing it with other ingredients at step 8.


Sunday, 6 July 2014

やきうどん: Fried Udon noodle

I had long break on this blog due to my main occupation, I knew the busy time coming but the last project took much longer than I expected....


Anyway, this is a simple recipe easy to remember. Udon is kind to your stomach and nice for digestion. Good to go as vegetarian without pork in.
Lately the packed soft Udon noodle become easy to reach, it's an "instant" style for us Japanese compare to dried noodles but really useful for this quick cooking.

Ingredients (per person):
1 soft Udon pack
1/4 onion - sliced
1/4 carrot - sliced
1/4 bell pepper - sliced
1/4 leek white part - sliced sliced
1 slice of bacon or equivalent amount of sliced pork berry
cabbage - equal amount as bacon

* Idea is, onion, carrot, bell pepper and leek are about same amount, then cabbage and bacon are in same amount and about double amount of onion.

* 2 kinds of Udon noodle you can find in market in UK

1/2 pot of water boiled in kettle
2 + 1 Tbsp vegetable oil
2 Tbsp soy sauce
2 tsp Worcestershire sauce
1/2 tsp salt if using pork berry
black pepper
(Optional) Katsuobushi (dried bonito flakes)
(Optional) Shichimi (seven flavor chili pepper)
* left: Shichimi, right: Katsuobushi - those are sold in Japanese glossary shops.

Method:
1. Slice onion, carrot, bell pepper and leek. Idea is slice them in almost same size/thickness so all can be cooked at same time.
2. Cut bacon to 1 to 2cm width, or slice pork berry thinly.
3. Cut cabbage into about 1 to 2 cm square.
4. Heat up a Chinese wok or a large pan on high heat, then put 2 Tbsp vegetable oil once the wok gets enough hot. Spread the oil all over the wok, then take out the excess of oil out on small dish (not plastic!) If you are garlic lover, put a crushed garlic before taking out oil then take it out with the oil, so the oil gets the garlic aroma.
5. Put onion and carrot in the wok, fry for 1-2 minutes until they are halfway cooked, then add bell pepper and continue cooking for another 1-2 minutes.
6. Add leeks and cook only for 1 minute, take all out in a pat or dish and put it aside.
7. Put back all oil again, spread through and take it off again.
8. Put the pork berry slice or bacon slice, fry until the oil start to melt and getting cooked, then add cabbage and fry until the cabbage slices are cooked. Put all vegetables back once, mix them, add pepper, add salt if it is pork berry. Put all aside again.

9. Prepare the Udon noodle. Majority of packed Udon sold in an individual small package ideal for a person. They are kind of soft but packed. It's so different if you do this trick first: Put the noodle on a strainer and place it in sink, pour over a boiling hot water all over the noodle. After pouring a half the water, then give some wagging by fork or chopsticks. Then pour over the rest of hot water. After that, pour the remaining vegetable oil from the wok and mix them well.

10. Now put the wok back on high heat, once heated up then add the another 1 Tbsp of oil in the work, spread the oil through the wok.
11. Add the noodle in the wok, put all vegetable & pork on top of it, then mix them quickly.
12. Add all soy sauce and Worcestershire sauce then mix them well. Cook until the sauce spread through for about 2-3 minutes.
13. Serve it on a large dish, pour over Katsuobushi freaks on top of it if you have. Put some Shichimi to spice it up as you like. Alternatively a bit of Nori freaks and mayonnaise are other common toppings.

Japanese version here: http://misaskitchen-jp.blogspot.co.uk/2014/07/blog-post_10.html

Wednesday, 7 May 2014

テリヤキバーガー - Teriyaki Burger


The typical "Teriyaki" sauce commonly known in European countries are actually very different sauce from the traditional Japanese Teriyaki taste. The European "Teriyaki" sauce is actually a sauce for sticky rice cake balls on stick, call Mitarashi taste in Japan.
But then about 20 years ago, MacDonald imported back the American "Teriyaki" taste for their local burger line, produced it as "Teriyaki burger" was a great success and became popular term.
Now a days, younger generation believe that's the original Teriyaki sauce in Japan too.
It's a quick and easy dinner for my home when I have very short time to fill my family's hungry stomach sounding loudly.

Ingredients (for 4 people - 2 burgers each):
8 pre-made beef burgers or 800g minced beef seasoned, mixed well and shaped 
(seasoning: salt, black pepper, nutmeg)
8 burger breads
1/2 onion sliced
3-4 leafs of  lettuce, rinsed and drained

for sauce:
1 cup water
1/4 cup soy sauce
1 Tbsp sake
1 Tbsp mirin
3 Tbsp sugar
1/2 Tbsp rice vinegar
1 Tbsp potato starch (mixed with 2 Tbsp water)

Method:
1. In a large frying pan, fry the sliced onion until lightly brown, then pour all ingredients for sauce except the potato starch. Cook it on medium low heat until all sugar melt, then pour in the potato starch (mixed with water well just before use) slowly in to the pan while mixing by a wooden spoon.
2. Once the sauce is thicken (about 30 sec) then stop the heat and put that aside.

* a small tip: regardless you buy a pack of pre-made hamburger stakes or make home made, shape the burgers in about 1 cm thick and make center slightly thinner than out side. At the end, this will make the burgers flat evenly.

3. Using another frying pan, fry the burgers. High heat to start on one side, once the side is cooked (slightly burned) then turn over and turn down the heat to medium, wait until the side also cooked equally. Turn over again now continue cooking until inside is cooked. 
4. Place the cooked burgers into the first frying pan with sauce and continue cooking all burgers. 
5. Once all burgers are cooked, place the burger breads in oven (180 degree), sliced side up. Then turn on the first frying pan with sauce and burgers in. Cook for 2-3 minutes with turning around the burgers in sauce, until the sauce get slightly thicker and get around the burgers.

5. Serve the warmed burger bread, lettuce and burgers with some extra remaining sauce on top. I love to put a lot of mayonnaise on it too. Chips will never be too much to go together. Enjoy.

Thursday, 24 April 2014

田楽とうふ - Dengaku tofu - BBQ tofu


Yes, Tofu on BBQ. It's a bit sound strange but one very traditional street food.
A bit crunchy outside, melting soft and burning hot inside, the rich sweet sauce makes the simple ingredient so tasty. Yummy.
Dengaku is the style of BBQ in Japan, and the sauce is called Dengaku-miso, commonly used on boiled or BBQ ingredients. The real sauce requires Hacho-miso, which really difficult to find outside of Japan. Instead I used Hoisin sauce which you'll be able to find at any Chinese glossary stores, but amazingly similar taste.
Unfortunately I had no chance to take photo of the real BBQ ones, it was too difficult to stop people eating them before taking any good shot. So this is a picture from the few left slices, I've repeated using a regular frying pan. Still, it was really good.

Ingredients:
1 pack Tofu (1 pack of Tofu makes 3 servings. Multiply by how much you want to prepare)

for Dengaku-miso sauce (easy amount to mix, for about 2-3 packs of Tofu):
2 Tbsp white miso
2 Tbsp Hoisin sauce
1/2 Tbsp soy sauce
2 Tbsp sugar
1 Tbsp mirin
(or 2.5 Tbsp sugar + 1 Tbsp sake, or 2.5 Tbsp sugar + 1 Tbsp water)
1 Tbsp sesame seeds

Required tools:
6 BBQ skewers
few kitchen papers
* 2 cutting boards - not too smooth ones
* a plate or kitchen towel
(* or instead, a large strainer, a large plate)
Some weight e.g. 2 coke cans

Methods:
1. Drain water from Tofu. This is a very common basic step for using Tofu when you want to use them for many recipes. Take out the Tofu from package, easily rinse under water.
Now prepare the platform to drain them. Place a cutting board just beside of your kitchen sink; one side to be over the edge of sink and elevate the other side few cm higher than the edge of sink using a plate (up-side down) or rolled up kitchen towel, so the cutting board makes a slope down to the sink. Now place Tofu on the cutting board, then place another cutting board over them, then place some weight - about 2 cans of coke.
1. Alternative step: If above step is difficult, instead wrap the Tofu by a kitchen paper, place it on a large strainer, place something flat like a plate larger than the Tofu, then place 2 cans of cokes.
2. Leave it for at least 30 min, ideally 1 hour. Pat any water around Tofu by new dry kitchen paper and place the Tofu on a cutting board.
3. Cut them into 3 long and thin slices.
4. Place one of the slices on cutting board, the largest surface up, then skew from the smallest surface using 2 BBQ skewers (see the picture for reference). It's easier to handle on BBQ if you make the skewers slightly open at the ending like a long V shape.
5. Prepare sauce. Mix all ingredients well in a small cup.
6. Place the skewed Tofu slices on BBQ - be careful not to turn around, leave them on for 10-15 minutes until the surface start to get slightly burned. Turn the side of Tofu time to time (just like any other BBQ things)
* For the top photo ones, I fried them on Teflon frying pan with high heat for about 15 minutes instead.

7. Place the Dengaku miso sauce over them. Some people brush the sauce on the Tofu and burn miso a bit on BBQ, I like it as the Photo with the miso totally soft. Just eat like any other BBQ things!

Alternative ingredients good with this sauce:
1. Aubergine - cut them into 6 slices, just like how you cut apples. Skew from the bottom of slice, where the skin is wrapping in curve, until top. BBQ in a same way as Tofu.
2. Leaks - cut it in to 3-4 cm longs, skew 5-6 of them from a side.  BBQ in a same way as Tofu.

Wednesday, 9 April 2014

手羽餃子 - Chicken wing gyoza


This is one of my most favourite dinner, the taste is guarantee great, even better than the ordinal Gyoza, just takes much care and time.
It looks like just a fried chicken wing, but the inside the bag of skin is full of Gyoza meat filled.

Just dip in the same Gyoza sauce and bite on. Can't forget the taste, can't give up making it even it takes so much effort & time. (It took me 2 hours...)

Ingredients:
about 12 chicken wings (we use only the wing tip part)
a) 200 g minced pork or chicken
a) 1/2 Tbsp ginger minced
a) 1.5 garlic cloves minced (I love a lot of garlic in but this is totally how much you can take)
a) 4 cm leak white part minced
a) 1/2 Tbsp soy sauce
a) 1/2 Tbsp sake
a) 1 tsp sesame oil
a)  salt & black pepper
toothpicks - as many as the chicken wings, plus few for spare


Serving sauce
Soy sauce & sushi-zu (1 : 1)
few drops of chilli oil (La-yu)

Method:
1. Mix all ingredients with a) above, leave it a side.
2. Prepare chicken wings. Firstly clean all wings under running water, take off any visible feather or the root remained.
3. Cut out the wings in to 2 parts. We need only the wing tip and the next section, not the meatiest near the body section (I usually use the remained sections for Karaage). Open the joint between the thickest part and the next one, hold the thicker side by your left hand, slide the knife along with the holding thick part - so keep the most of skin on the other side. If you slide the knife straight down along with the thick part, that should hit the joint cartridge and should be easy to cut into two pieces.


4. Take off bones from the next section. Basically the part becomes a bag for the minced meat. Using a sharp knife, slides down the skin and meat about 1cm from the cut off joint, so the junction of 2 thin bones appear. On the junction at just between those 2 bones, slice down the knife and cut off the junction connecting those 2 bones, so those 2 thin bones become disconnected each other and free to move independently. Push down the meat around the top further, trim a bit using knife if you need.
5. Now stand the section - the cut off joint up. There are 2 bones, a thin bone and an even thinner bone there. Pull and open those bones apart from each other, to about 180 degree, with sliding down the meat around the thinner bone. This shouldn't be too hard. Now twist and screw the thinner bone for 360 degree, then the bone will be totally free to take off.

6. Now thicker bone. The skin is connected to the bone at only one side like a line. All other part are with meat just hanging around that. So using the sharp knife, take off the skin connection along the bone until half of the bone length. Now hold the wing tip by your left hand, hold the bone on your right hand, then snap  the joint to front, back , up and down, then twist the bone for 180 degree - now the bone is totally free from joint and easy to pull off.

* If you think the steps until here are too hard, just make them Karaage, because the most painful part is after this. 

7. Prepare toothpicks and a small spoon handy. Each chicken wing now has a cavity to fill with the minced meat mixture. But those still have chicken meat until near the end of the skin bags. Using the small spoon, push off the meat around the entrance of the skin bag and make clear of meat for enough space to close them later. Then using the same small spoon, push enough meat mixture into the cavity - fill as much as you can but think you have to close at the end; the skin is flexible and not easy to break or explode during cooking.
8. Just like sawing the clothes, saw together the mouth of each bag by the toothpick, about 3 stitches, so the open part of bag is closed and the contents cannot come out. Be really careful for not stubbing your fingers.

9. Now easy part. On a frying pan, put about 1 tbsp vegetable oil. If you are using Teflon frying pan, you don't need any oil. Turn on the heat to medium high, place all wings - thicker skin side down. Fry them until the down side gets brown, and then turn them over.
10. Once the other side also get brown, pour about 1/2 cup water in the pan then cap it, turn down the heat to medium and keep cooking for about 10 min. 
11. Take off the cap and continue cooking until the water is mostly evaporated. Keep in mind the water will get reduce, but oil will come out from wings, so drain the oil out if you don't like them. 
12. Serve them with steamed rice. Take off the toothpicks before you dig in!

Thursday, 3 April 2014

ひき肉となすのカレーライス - Japanese minced meat & aubergine curry


There is a huge difference between Japanese curry and Indian original curry. Japanese curry is much thicker like stew, mild or not spicy at all compare to any other curries, usually chunks of vegetables and meats are in and served with rice on a plate, garnished by some pickles.
This has a really good reason and history behind it.
Curry was introduced to Japan by the UK trading ship about 200 years ago. That curry was a British curry, the earlier adapted style from colonies, which was more like a mixture of stew and curry powder.
Then after that style is imported to Japan, that British version is adapted again; it has been thickened by the flour and served with rice.

The Japanese Curry Rice is one of the most popular meal in Japan, very close to Ramen.
To make Japanese Curry you don't use spices, you use "Curry roux"; it's a block of instant curry sauce.
There are 2-3 big food makers proving the roux and they are dominating JP market, and, they are all more or less same taste; this means, every family in Japan eat mostly same taste curry at home.
We do mix the different company's roux and make "home special" but that doesn't make that much difference, unlike between masala and tkika. Small percentage of families may add some additional things in it, but not the thing you may consider for making curry; soy sauce, dashi, mayonnaise, and most unusual one, chocolate.

At the end, the real variations are created by what is cooked in the curry sauce.
Most basic ingredients are chunk of: carrot, onion, potato and beef or pork stew meat.
My minced meat & aubergine curry is a kind of unusual variety in Japan, it's much quicker to cook than the regular style one but the taste has nothing to compromise compare to the regular ones.


Ingredients (for 4-6 people):
1 pack Japanese curry roux (better if you can have half pack each of any 2 kinds)
500g minced meat (beef, pork or chicken. No lam. I used pork this time).
1 large aubergine
1 medium onion minced
enough water as the curry roux package states.
3 Tbsp vegetable oil
(optional) 1 tsp sake
(optional) 1 tsp soy sauce


Methods:
1. Dice the aubergine into about 1cm cubes. Put them in a large bowl of cold water, place a plate in the bowl over the floating cubes and push in; so all cubes can sank in the water. Leave it for 10 minutes then drain them by a strainer.
2. Put a large pot on a hob with oil, then turn the hob to medium high heat. Fry the minced onions for 5 minutes until it start to get brown.
3. Put all minced meat, fry them together, separate the minced meat to grains. I like to add sake here because that can reduce meat strong smell, but that's totally optional. Cook until all minced meat change the colour and cooked.
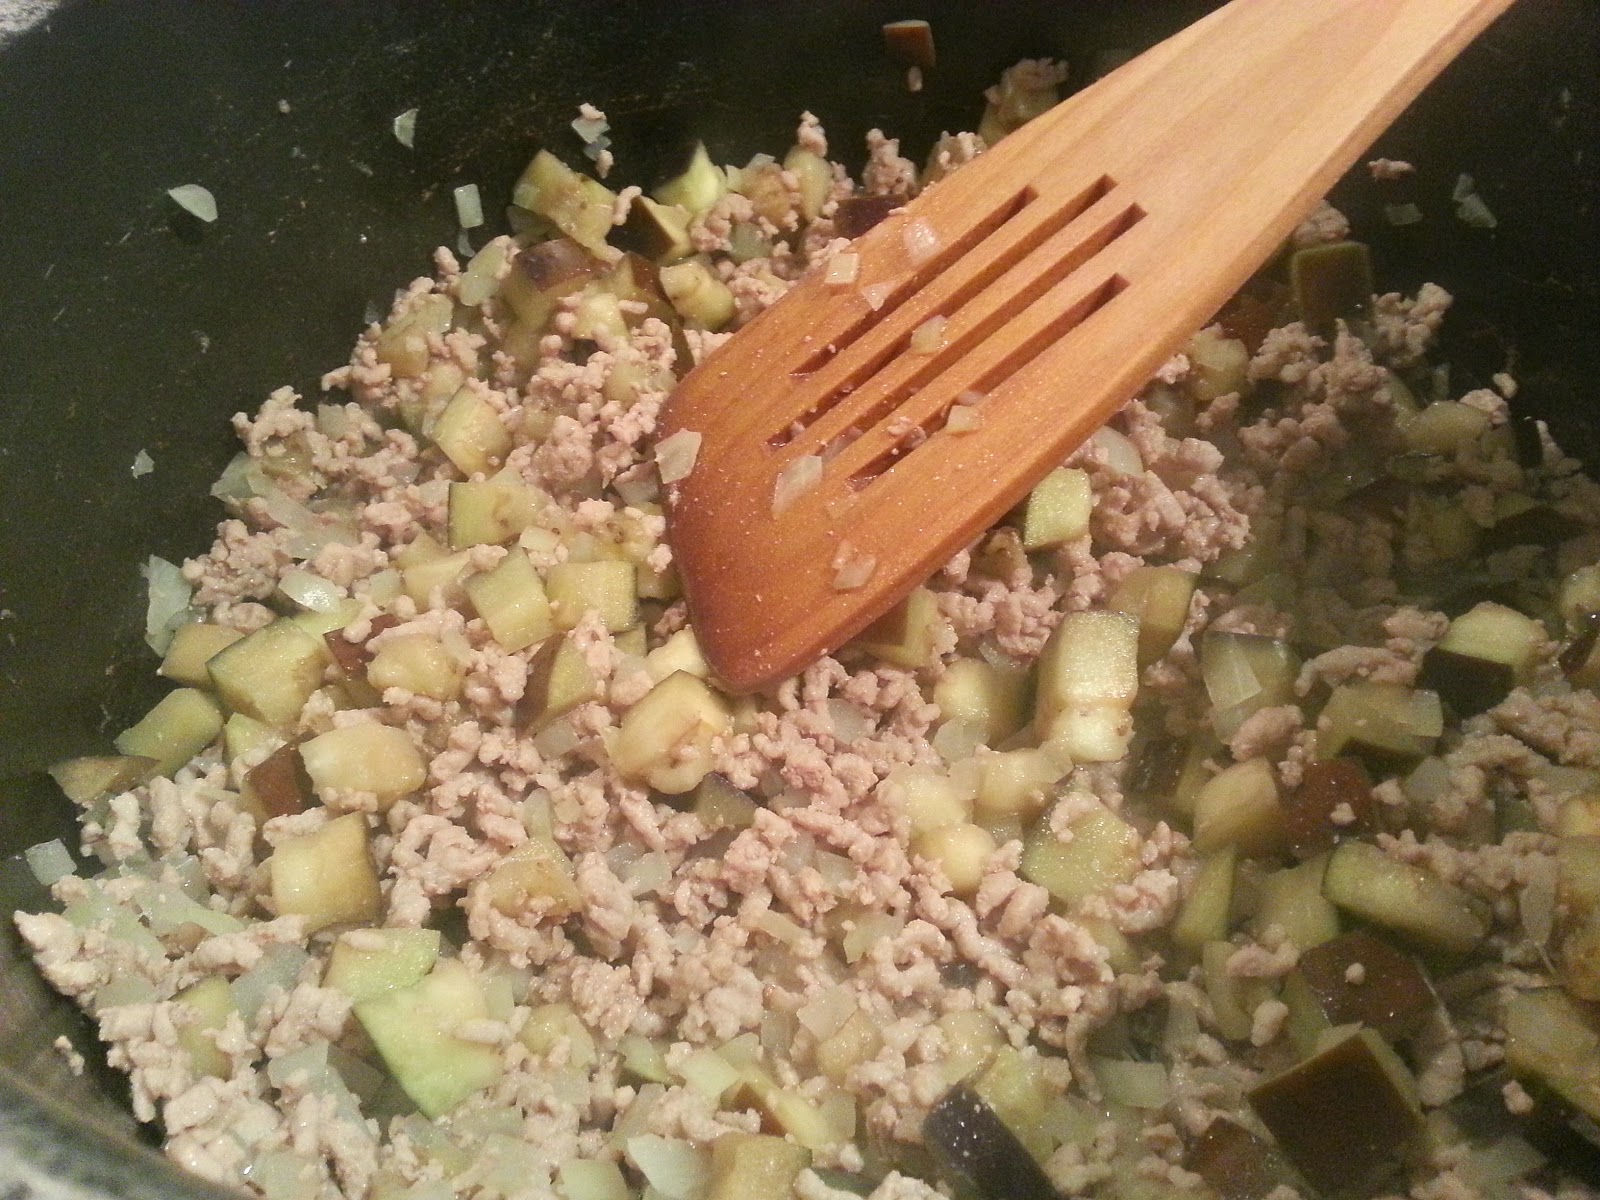
4. Drain the water well and put all diced aubergine in the same pot, fry them together until aubergine cubes get soft, for about 10 min.
5. Pour water in the pot as your box of curry roux says, skim the scum for first few minutes and cook it for another 10 minutes. (Package may say to cook for 1 hour, don't worry, that's the time takes for cooking chunks of veggies and meats, not applicable to today's cooking)
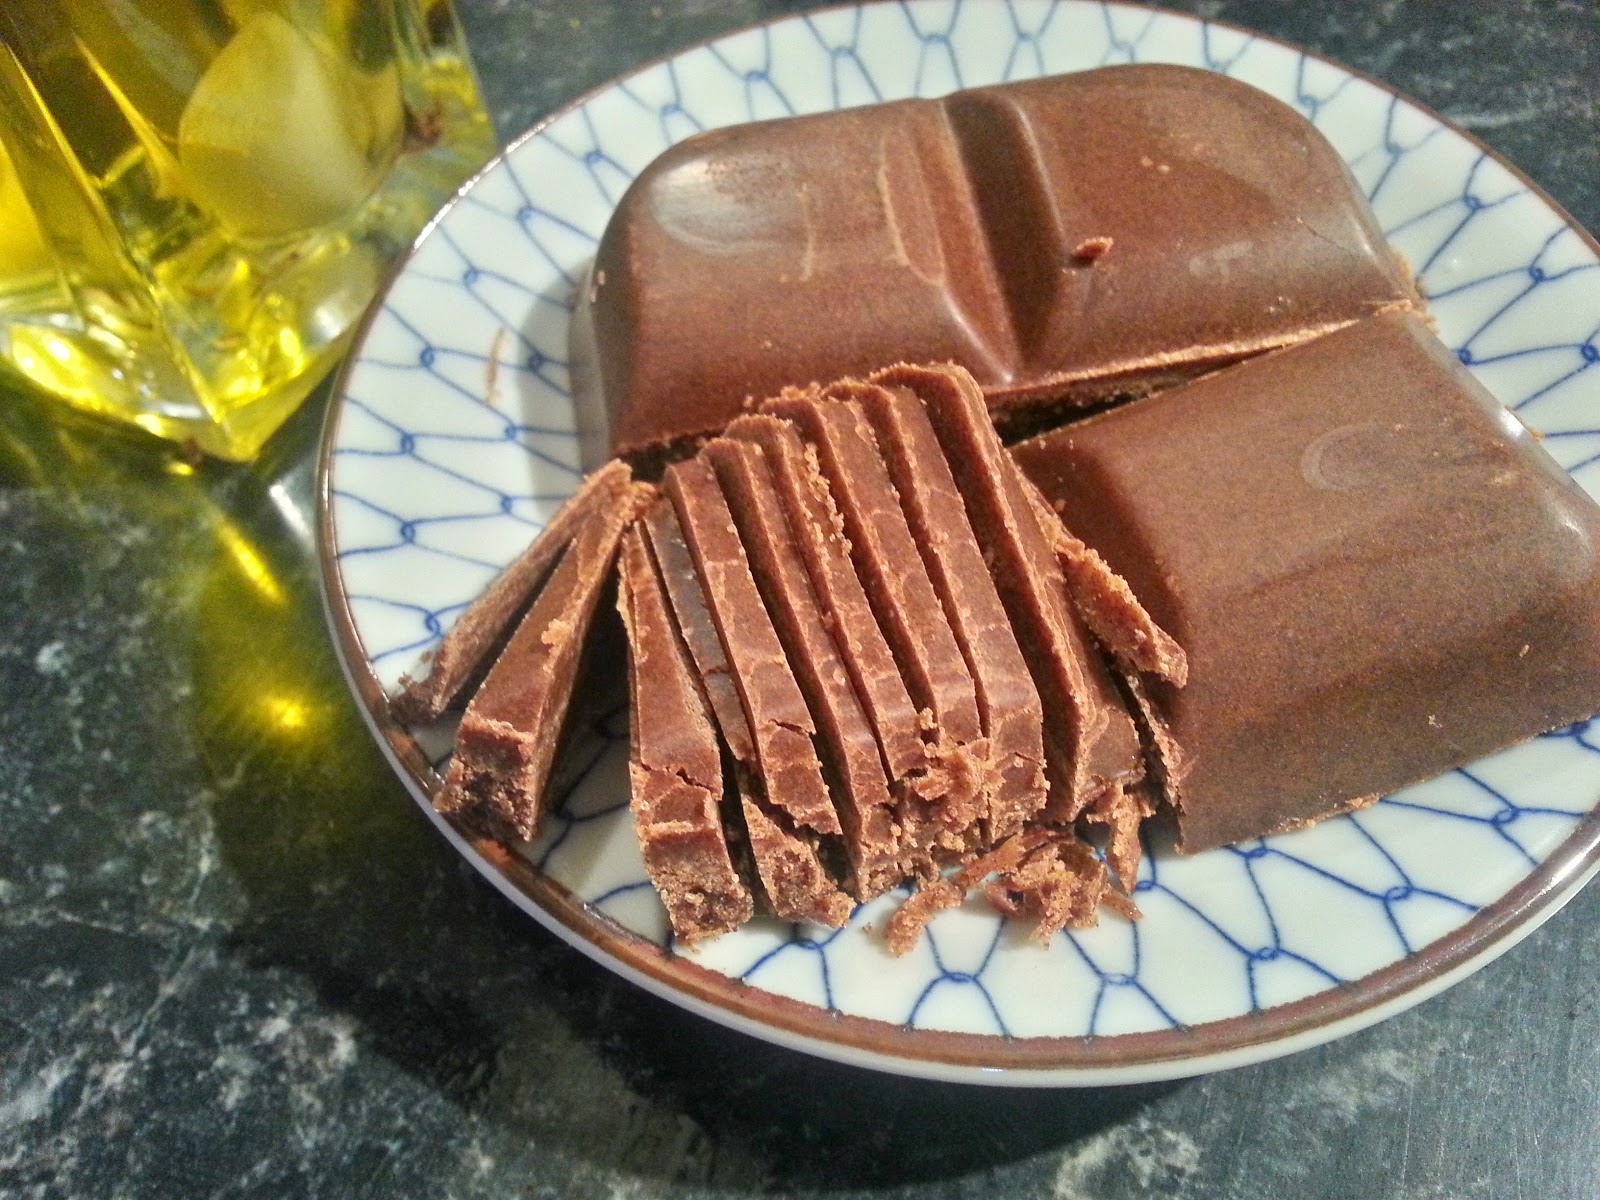
6. Meanwhile, slice the curry roux. Each curry roux box comes with 2 packs of curry bars, each bar is ready to break in to 4 pieces, and most of package says you can just add them as how it is. Truce is, it doesn't melt well always, a remained piece of roux looks totally like a chunk of been in the curry sauce; if you even once hit that in your mouth then you wouldn’t complain for this step. Put the bar on a cutting board and slice them as thin as you can.

7. Add the sliced curry roux in the pot, immediately mix them well in to soup. Cook for another 10- 20 minutes, until the aubergine gets really soft.
8. Curry rice serving style: serve a small mountain of rice on one side, then serve the curry on the other side.