Sunday, 20 July 2014

Home prepared herbal olive oil


There are few condiments and sauces that I cannot ever allow to run out at my home.
Asian line-ups are as you can imagine, but not limited to.
This is what I have to have all year around, one thing that I can't allow to run out.
A lot of shops sale herbal olive oil with the different spiced version, but in my opinion, homemade one is the best. You know what's in it, which kind of olive oil is in, and you can keep making it.
And the biggest difference, it is as fresh as you make!
I use the rosemary from my garden in summer, the taste of pleasure from my own home.

I lined up the ingredients in my favourite balance, but it's totally up to you what to include and how much in the bottle. Try to choose "hard" things (e.g. dried chili, condiments, nuts etc.) and better to avoid the ingredients easy to spoil (e.g. meat, fish, leaf salad etc) unless you meant to use up in once.

Ingredients:
1 stem rosemary
2 small bay leaves
1 small garlic clove
4-5 black pepper corn
1 garlic - pealed
about 10 fennel seeds

Method:
Just bottle it. You can feel the herbal flavour from the right next day.
Basically you don't need to replace the all things in the bottle every time, because the olive oil preserves the ingredients in the bottle quite well.
Point is, keep adding more oil to the bottle whenever you use more than the line of ingredients in the bottle and keep all things under the oil.
Rosemary leaves will come off from the stem but it will not going to get spoiled.
Yet, I do change them about once per about 5 times full refill usage.

This is just when I bottled it. Both the rosemary and olive oil are shinny green.


Then this is the next day, you can see that the rosemary green already started to melt into the olive oil and the oil has fresh rosemary aroma.

By the time, the taste will change to more mature and stronger flavour, and that's the another fun.
I use them for pizza dough, salad dressings, meat-sauces, pastas and more.
My latest best favourite way is, dipping a piece of freshly baked foccacio or crunchy baguette in the dish of this oil from the first 2-3 days with freshly clacked black pepper, sea salt and grated parmigiano cheese. This cannot be starter, because you can't stop eating it :-)

Saturday, 19 July 2014

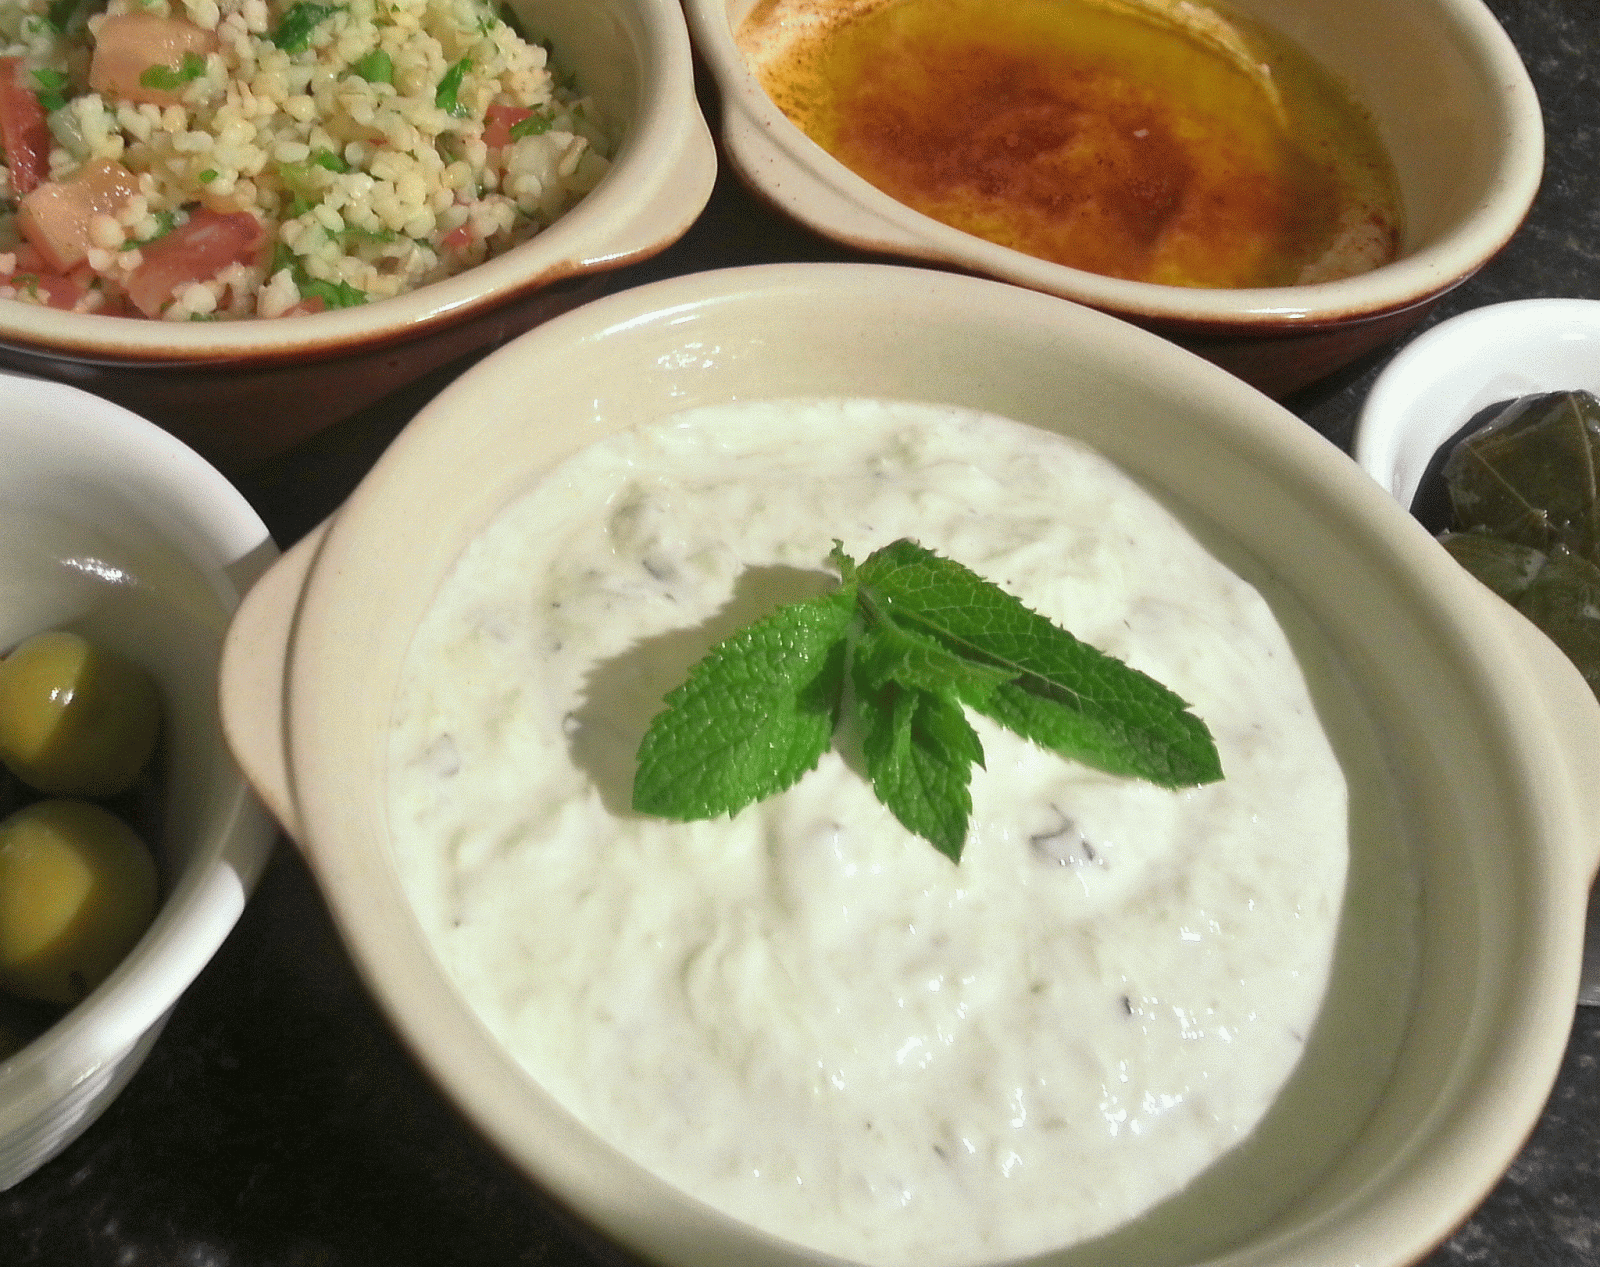
Tzatziki - Greek cucumber & yogurt cream


Tzatziki is the one thing I learnt before knowing the name of the dish.
There were excellent Greek restaurant in Pasadena LA, it was near to our home and we went there for all good occasions. So much great memories at the restaurant and it was with completely new type of taste for me at that time. I even never had an idea of using yogurt for cooking so at the beginning, I couldn't tell what even was the base of cream.
Once I moved UK, I realise that Greek food is not cheap here (or any eating out is not cheap compare to US), so my stomach forced me to learn all good taste I could recall.
So the recipe was from several books and people, but the taste adjusted to what I liked.
Nice to serve with all other great Greek foods especially with the oven grilled lamb meatballs in a pita bread.

Ingredients:
1 cucumber - skinned and grated
300g yogurt
1 garlic - crushed and chopped
about 5-7 leafs of mint - sliced and chopped
1/4 tsp salt
some black pepper as you like

Method:
1. Prepare the vegetables: cut in half and skin the cucumber until near the end (leaving a bit at the end allows you to hold the cucumber easier) then grate it with a grater (I use the one for grating the parmigiana cheese). Put it out on a strainer, squeeze them as much as you can to drain out all liquid.
2. Crush the garlic by a side of your knife, then chop it to very fine mince.
3. If you’ve got a bunch of mint, take only the soft leaves, wash it under water then drain the water out. I like the mint short thin strings in this cream, so once slice them all finely then turn it and chop them roughly.
4. Combine all in a bowl then keep it in the refrigerator for few hours.

5. Serve them with some grilled meat or fish; our favourite is to have some with the oven grilled lamb meatballs in a pita bread.

like this :-)

Wednesday, 16 July 2014

ささ身のサラダ - Chicken breast salad


This salad is a long running favourite dish for our family, usually heavily routine through the hot summer. It can be nice nibble for serving with drinks, also quite adequate for serving as a main dinner plate on its own, or with some white steamed rice, especially during the hot summer days like now. It looks very simple, but the threaded chicken absorbs the fresh sauce and a hint of sesame oil invites you to eat more. Because you can leave it for overnight, it's nice for party and pot-luck-lunches.
My mom's original recipe uses threads of Zha Cai, is a spicy Sichuan pickles, but the Japanese adapted seasoning one (means not-so-spicy), which either not easy to find or very expensive even you find in here UK.
My recipe uses cucumber for replacement, and actually has gained the better response from my guests here.

Ingredients (3-4 people):
2 big slices or 3 small slices of Chicken breast
2 slice ginger
1 leek - green part only

4 x 5cm leek - white part only (about 5cm x 2 per each leek, 2 leeks)
1/2 cucumber
1tsp salt

6 Tbsp sushi vinegar
3 Tbsp soy sauce
1 Tbsp sesame oil
1/2 tsp sugar
some black pepper

Method:
1. Prepare chicken: boil the chicken breast with 2 slice of ginger (with skin but cleaned) and green part of a leek (cut of very end and clean the soil out under running water before use) for about 20-25 minutes, then leave them in the boiled water until all cool down.
2. Meanwhile prepare vegetables: we need 4 pieces of 5cm length white part of leeks, usually you can take up to 2 parts per one whole length. Take the most outside skin off if its not soft enough (US leeks may need to peal 2 skins off...) cut off the very ending with loots, then cut them in to 5cm length, slice them into thin julienne. If the leek is spicy as the one from Japan then you may need to soak it in a bowl of water for 5min before use.
3. Skin the cucumber, cut in half along with the length, take off the center transparent par will seed using either knife or spoon. Cut in to half width again, the slice them in about a half cm width slices.
4. Put all slices of cucumber in a small bowl, add the 1tsp salt and mix them well, then leave it for about 10min.
5. Put the cucumber slices on a strainer, wash out the salt under running water well, then grab a hand full of slices at once and squeeze out all water in your hand. Repeat that for all slices. Doing so, it will prevent making the salad soggy later, and keep the cucumber crunchy in the salad.
6. Prepare the sauce: just mix the listed ingredients well.
7. Once the chicken breast get cool down, then break them into few small pieces, and thread to the string one by one as thinner as your patient can handle. The thinner you can thread the better absorb the sauce and tastier later.
8. Mix the threaded chicken, julienne leeks, sliced and squeezed cucumber in a bowl roughly, then pour over the mixed sauce, mix the whole thing again.
9. Leave it in your refrigerator for at least 1 hour, even better if you can leave it for overnight before serve.

* If you can find a good Zha Cai  then you might want to try my mom's version; you firstly clean the Zha Cai out from soaked spicy juice well. If it is a whole one then slice it, and then cut it into threads. Soak the threads in a cup of water for 5 minutes and drain out the water before mixing it with other ingredients at step 8.


Friday, 11 July 2014

Asparagus cream


This wonderful recipe was from +Loretta Sebastiani, it was a great hit in my family. She has introduced this in foodies+ as a part of Seasonal flavors on canapé top or seafood tartine unfortunately it's not easy to find fresh seafood to serve it together, so I served this simply as a cream with all other Mediterranean style vegetables.
This picture was from my son's birthday, my first trial, that I used LactoFree cheese instead of ricotta for my mother in law's diet. Still the freshly prepared cream was so nice on the crunch toasted slice of budget.

Her recipe page is here.

Sunday, 6 July 2014

やきうどん: Fried Udon noodle

I had long break on this blog due to my main occupation, I knew the busy time coming but the last project took much longer than I expected....


Anyway, this is a simple recipe easy to remember. Udon is kind to your stomach and nice for digestion. Good to go as vegetarian without pork in.
Lately the packed soft Udon noodle become easy to reach, it's an "instant" style for us Japanese compare to dried noodles but really useful for this quick cooking.

Ingredients (per person):
1 soft Udon pack
1/4 onion - sliced
1/4 carrot - sliced
1/4 bell pepper - sliced
1/4 leek white part - sliced sliced
1 slice of bacon or equivalent amount of sliced pork berry
cabbage - equal amount as bacon

* Idea is, onion, carrot, bell pepper and leek are about same amount, then cabbage and bacon are in same amount and about double amount of onion.

* 2 kinds of Udon noodle you can find in market in UK

1/2 pot of water boiled in kettle
2 + 1 Tbsp vegetable oil
2 Tbsp soy sauce
2 tsp Worcestershire sauce
1/2 tsp salt if using pork berry
black pepper
(Optional) Katsuobushi (dried bonito flakes)
(Optional) Shichimi (seven flavor chili pepper)
* left: Shichimi, right: Katsuobushi - those are sold in Japanese glossary shops.

Method:
1. Slice onion, carrot, bell pepper and leek. Idea is slice them in almost same size/thickness so all can be cooked at same time.
2. Cut bacon to 1 to 2cm width, or slice pork berry thinly.
3. Cut cabbage into about 1 to 2 cm square.
4. Heat up a Chinese wok or a large pan on high heat, then put 2 Tbsp vegetable oil once the wok gets enough hot. Spread the oil all over the wok, then take out the excess of oil out on small dish (not plastic!) If you are garlic lover, put a crushed garlic before taking out oil then take it out with the oil, so the oil gets the garlic aroma.
5. Put onion and carrot in the wok, fry for 1-2 minutes until they are halfway cooked, then add bell pepper and continue cooking for another 1-2 minutes.
6. Add leeks and cook only for 1 minute, take all out in a pat or dish and put it aside.
7. Put back all oil again, spread through and take it off again.
8. Put the pork berry slice or bacon slice, fry until the oil start to melt and getting cooked, then add cabbage and fry until the cabbage slices are cooked. Put all vegetables back once, mix them, add pepper, add salt if it is pork berry. Put all aside again.

9. Prepare the Udon noodle. Majority of packed Udon sold in an individual small package ideal for a person. They are kind of soft but packed. It's so different if you do this trick first: Put the noodle on a strainer and place it in sink, pour over a boiling hot water all over the noodle. After pouring a half the water, then give some wagging by fork or chopsticks. Then pour over the rest of hot water. After that, pour the remaining vegetable oil from the wok and mix them well.

10. Now put the wok back on high heat, once heated up then add the another 1 Tbsp of oil in the work, spread the oil through the wok.
11. Add the noodle in the wok, put all vegetable & pork on top of it, then mix them quickly.
12. Add all soy sauce and Worcestershire sauce then mix them well. Cook until the sauce spread through for about 2-3 minutes.
13. Serve it on a large dish, pour over Katsuobushi freaks on top of it if you have. Put some Shichimi to spice it up as you like. Alternatively a bit of Nori freaks and mayonnaise are other common toppings.

Japanese version here: http://misaskitchen-jp.blogspot.co.uk/2014/07/blog-post_10.html

Wednesday, 7 May 2014

テリヤキバーガー - Teriyaki Burger


The typical "Teriyaki" sauce commonly known in European countries are actually very different sauce from the traditional Japanese Teriyaki taste. The European "Teriyaki" sauce is actually a sauce for sticky rice cake balls on stick, call Mitarashi taste in Japan.
But then about 20 years ago, MacDonald imported back the American "Teriyaki" taste for their local burger line, produced it as "Teriyaki burger" was a great success and became popular term.
Now a days, younger generation believe that's the original Teriyaki sauce in Japan too.
It's a quick and easy dinner for my home when I have very short time to fill my family's hungry stomach sounding loudly.

Ingredients (for 4 people - 2 burgers each):
8 pre-made beef burgers or 800g minced beef seasoned, mixed well and shaped 
(seasoning: salt, black pepper, nutmeg)
8 burger breads
1/2 onion sliced
3-4 leafs of  lettuce, rinsed and drained

for sauce:
1 cup water
1/4 cup soy sauce
1 Tbsp sake
1 Tbsp mirin
3 Tbsp sugar
1/2 Tbsp rice vinegar
1 Tbsp potato starch (mixed with 2 Tbsp water)

Method:
1. In a large frying pan, fry the sliced onion until lightly brown, then pour all ingredients for sauce except the potato starch. Cook it on medium low heat until all sugar melt, then pour in the potato starch (mixed with water well just before use) slowly in to the pan while mixing by a wooden spoon.
2. Once the sauce is thicken (about 30 sec) then stop the heat and put that aside.

* a small tip: regardless you buy a pack of pre-made hamburger stakes or make home made, shape the burgers in about 1 cm thick and make center slightly thinner than out side. At the end, this will make the burgers flat evenly.

3. Using another frying pan, fry the burgers. High heat to start on one side, once the side is cooked (slightly burned) then turn over and turn down the heat to medium, wait until the side also cooked equally. Turn over again now continue cooking until inside is cooked. 
4. Place the cooked burgers into the first frying pan with sauce and continue cooking all burgers. 
5. Once all burgers are cooked, place the burger breads in oven (180 degree), sliced side up. Then turn on the first frying pan with sauce and burgers in. Cook for 2-3 minutes with turning around the burgers in sauce, until the sauce get slightly thicker and get around the burgers.

5. Serve the warmed burger bread, lettuce and burgers with some extra remaining sauce on top. I love to put a lot of mayonnaise on it too. Chips will never be too much to go together. Enjoy.

Thursday, 24 April 2014

田楽とうふ - Dengaku tofu - BBQ tofu


Yes, Tofu on BBQ. It's a bit sound strange but one very traditional street food.
A bit crunchy outside, melting soft and burning hot inside, the rich sweet sauce makes the simple ingredient so tasty. Yummy.
Dengaku is the style of BBQ in Japan, and the sauce is called Dengaku-miso, commonly used on boiled or BBQ ingredients. The real sauce requires Hacho-miso, which really difficult to find outside of Japan. Instead I used Hoisin sauce which you'll be able to find at any Chinese glossary stores, but amazingly similar taste.
Unfortunately I had no chance to take photo of the real BBQ ones, it was too difficult to stop people eating them before taking any good shot. So this is a picture from the few left slices, I've repeated using a regular frying pan. Still, it was really good.

Ingredients:
1 pack Tofu (1 pack of Tofu makes 3 servings. Multiply by how much you want to prepare)

for Dengaku-miso sauce (easy amount to mix, for about 2-3 packs of Tofu):
2 Tbsp white miso
2 Tbsp Hoisin sauce
1/2 Tbsp soy sauce
2 Tbsp sugar
1 Tbsp mirin
(or 2.5 Tbsp sugar + 1 Tbsp sake, or 2.5 Tbsp sugar + 1 Tbsp water)
1 Tbsp sesame seeds

Required tools:
6 BBQ skewers
few kitchen papers
* 2 cutting boards - not too smooth ones
* a plate or kitchen towel
(* or instead, a large strainer, a large plate)
Some weight e.g. 2 coke cans

Methods:
1. Drain water from Tofu. This is a very common basic step for using Tofu when you want to use them for many recipes. Take out the Tofu from package, easily rinse under water.
Now prepare the platform to drain them. Place a cutting board just beside of your kitchen sink; one side to be over the edge of sink and elevate the other side few cm higher than the edge of sink using a plate (up-side down) or rolled up kitchen towel, so the cutting board makes a slope down to the sink. Now place Tofu on the cutting board, then place another cutting board over them, then place some weight - about 2 cans of coke.
1. Alternative step: If above step is difficult, instead wrap the Tofu by a kitchen paper, place it on a large strainer, place something flat like a plate larger than the Tofu, then place 2 cans of cokes.
2. Leave it for at least 30 min, ideally 1 hour. Pat any water around Tofu by new dry kitchen paper and place the Tofu on a cutting board.
3. Cut them into 3 long and thin slices.
4. Place one of the slices on cutting board, the largest surface up, then skew from the smallest surface using 2 BBQ skewers (see the picture for reference). It's easier to handle on BBQ if you make the skewers slightly open at the ending like a long V shape.
5. Prepare sauce. Mix all ingredients well in a small cup.
6. Place the skewed Tofu slices on BBQ - be careful not to turn around, leave them on for 10-15 minutes until the surface start to get slightly burned. Turn the side of Tofu time to time (just like any other BBQ things)
* For the top photo ones, I fried them on Teflon frying pan with high heat for about 15 minutes instead.

7. Place the Dengaku miso sauce over them. Some people brush the sauce on the Tofu and burn miso a bit on BBQ, I like it as the Photo with the miso totally soft. Just eat like any other BBQ things!

Alternative ingredients good with this sauce:
1. Aubergine - cut them into 6 slices, just like how you cut apples. Skew from the bottom of slice, where the skin is wrapping in curve, until top. BBQ in a same way as Tofu.
2. Leaks - cut it in to 3-4 cm longs, skew 5-6 of them from a side.  BBQ in a same way as Tofu.