Wednesday 29 January 2014

Japanese and Oriental ingredients: Miso - soy been paste

Miso - fermented soy beans paste

Miso is fermented soy beans paste combined with Kouji - fermentation starter made by rice. It usually takes over a year to naturally ferment the boiled soy beans, therefore requires enough salt to preserve it.
In general, miso has natural sweetness, slight sourness, and at end quite strong saltiness that required for preserving the fermented product. The texture is usually smooth and creamy, combined with the beans natural sweetness, somehow you may feel similarity to Mediterranean humos.
There are a lot of variety per what is in the product e.g. barley, Soba beans, chili etc. or where the product produced from e.g. Sinshu (central Japan), Hokkaido (Hokkaido-island), Saikyo (west side Japan), and how it has been processed e.g. organic, pure soy beans, very matured, sweetened etc.

There are 3 main types: white, red and dark brown.
The white and red miso are mostly made from both rice (Kouji) and soy beans, the colour gets darker by the length of maturating period.
The whiter one has 2 different types in there - one is with shorter processed one with stronger salt, and the other one is with higher rate of Koji, which contains lesser salt and has sweeter taste.
The red type is usually has more matured taste, gets stronger bean smell, sweeter and stronger taste.
The dark brown one usually contains soy beans only; has harder texture and difficult to melt in to soup, stronger bean flavor but with stronger bitterness too.

In general, colder part of Japan makes saltier miso and west side prefer the sweeter miso.
The miso you can find at the any super market does not have very strong fermented smell especially when it is cold, where the real homemade miso often has specific stronger fermented smell and rough texture.
Miso is something that you can produce at your home; the traditional family used to prepare this during the winter time to start using the one after the year, which no longer common among the people living in big town.
Yet, if you travel around Japan, there are uncountable variety of miso that produced in each area with unique taste; we often enjoy buying different kinds and mix them to make our own favorite combinations.

Many people knows that the miso is the main ingredient to make miso soup, however unlike the strong taste that you feel when you try it only by its own, it is salty but has too less flavor to make the soup by its own; therefore generally requires to get some stock taste - we call Dashi - out from Konbu seaweed and fish flakes before adding any miso.
Lately you can find some product that Miso already combined with the stock taste in a pack- to help making miso soup quickly.

Miso loses its flavour if you over cook; to make miso soup (I may describe detail in another post one day) tastier, you make Dashi soup first then cook the chosen ingredients in the Dashi before adding miso paste, then stop the fire before the soup gets totally boiling again.

<Example products you can find in UK>
Easy and good: Marukome restaurant taste (red miso)
This miso has Dashi already combined.
Easy to use, makes most commonly good taste soup.
Majority of Japanese glossary shops carry this product e.g. TK tradings.

Excellent: Saikyo shiro miso

This is an western Japanese style miso, contains higher rate of good quality Kouji, which makes the miso naturally sweeter. It does not contain alcohol usually but has sake aroma slightly.
Most of eastern Japanese include Tokyo region people, like me, use this miso and other general brown miso mixed.
TK trading used to carry this product - then, it became too expensive and now disapeared. Today I no longer can find this product in UK, I just found the another maker's same type product as below at RiceWine shop:


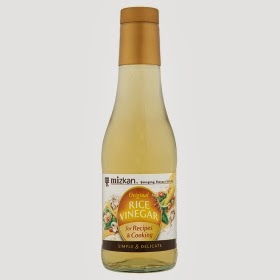
Presumably good: Clearspring Sweet White Miso - apparently Waitrose started to carry this.

I must be honest I've never try this particular product yet. Looking at the description of this product in their web page, this must have followed the Saikyo style miso making.
I'm expecting to try in near feature.


Daily use: Hanamaruki Soy been paste White type (Sinshu style shiro miso)

While ago, Tesco carried this product. Hanamaruki is a well known traditional Miso provider, the product is from Sinshu where the white miso is more saltier than other area. Hope they will carry again. This product does not contain Dashi.

Daily use: Hikari Miso Junsei Sinshu Miso (red miso)

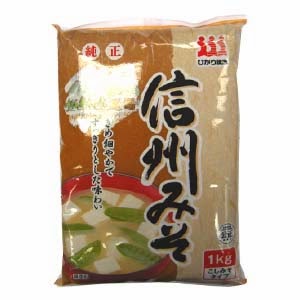
This is at the bottom of market price, however has no lesser taste than the above products. Criticism if I have to say is that those cheaper product has less characteristics and salted quite stronger.
However, like I commented above, we usually mix those cheaper miso with the other miso, especially the one over "unique" miso like country-side style miso or the home made ones.


Unique: Mugi Miso (Barley miso) - Japan Center original

This has usually more gentle sweetness than the regular miso and contains bits of barley remaining, and that makes this type products unique texture. We use this type of product for vegetable dip than making miso soup.

Unique: Clearspring Hatchou Miso

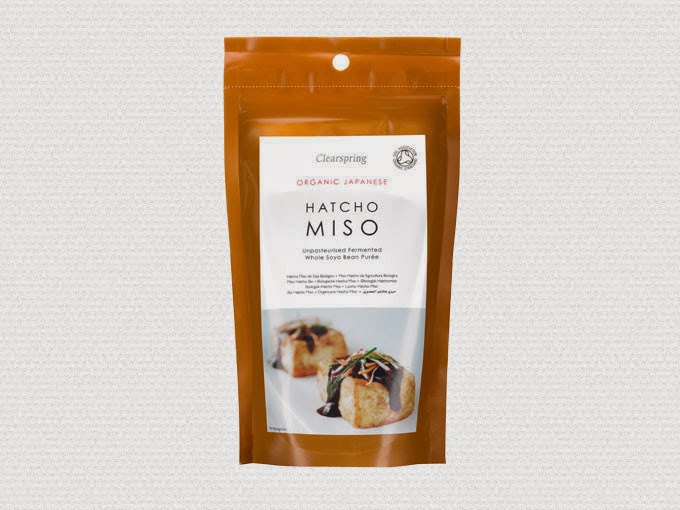
Hatchou Miso is often combined with Mirin - sweeten cooking wine - and used for the following recipes: BBQ Tofu, boiled Konnaku, boiled Daikon, Oven baked aubergine.
It has strong beans flavor with the natural bitterness; when sweeten by Mirin, that gives a vivid contrast against those very simple flavor ingredients. Usually served as a part of source over the foods. You can also use this for general BBQ source and for vegetable dips too.

Miso usually doesn't need to be kept in the refrigerator until you open the package, but most of them are easy to change its colour and flavor by the sun light; so it is ideal to keep it in a cupboard.
Miso can last much longer than soy source with the original taste, however it gets harder. The product contains the active fermentation base - so basically oxygen and warmness will help the product to continue the fermentation process further, and that changes the original miso taste. Once you open the package, it is ideal to keep the package in a tapper-ware or buy the product with sealing pack to keep out air, and must keep it in a refrigerate.

Monday 27 January 2014

Tiramisu


I made this last week, following the recipe from this web page - indulgent one, using my friend's home produced eggs. Very nice recipe, perfectly fit to what I wanted to eat.
Unforgettable perfect slice.

Fish for sushi - fish in UK market

You can find very nice sushi ready fish blocks from proper Japanese glossary shops, but they are very expensive.
Whenever I see really fresh fish in usual super market, I've been trying them if they can fit to make some sushi.
This is my note to keep record of fish that worked well with sushi.
* Description below does not guarantee anything for suitableness of fish to eat for sushi, use them on your own risk. I do take risk yes, I never had food poisoning by my sushi yet.

Shake - Salmon

Where to buy: Smoked salmon - any super market. Whole salmon - ASDA fish counter
Risk level: Smoked salmon - very low / fresh salmon - low as long as the salmon is from UK
How often I can find fresh ones: almost every week
Point to check: Smoked salmon - see the package. Fresh salmon - Cannot use the wild salmon; the salmon in UK market coming from Scotland are not wild. Check at the fish counter to be sure. The fish eyes are clear and still fresh, blood eyes are OK. Whole body is covered by clean scales, shiny silver, the body is springy and hard.
When you cut, the orange meat and white strips are clearly separated and springy, the cut surface is slightly shine by the fish natural oil.
How to prepare: Smoked salmon - just from package. Nice to make Oshi-zushi - pressed sushi.
Fresh salmon - If you like to make sure like me, freeze the center chunk of half side (after taken the skin and bone) once then slice when the chunk start to melt in to Shashimi. Detail - I might post the detail in another day.

Maguro - Tuna

Where to buy: slice from ASDA fish counter
Sainsbury used to carry very fresh Tuna slices in pack before, but no longer that case. Lately ASDA carries better slices on their fish counter in Swindon. They usually defreezing the next batch of slices behind the shop, you can ask them to check if there is any just ready ones nicely.
Risk level: Low
How often I can find fresh one: almost every week
Point to check: The surface of cut is shiny and can see something like rainbow effect. The cut corners are sharp, colour of fish is not only red but has some transparency.
How to prepare: Sashimi - Slice them in a right angle to thin strings between meat, slightly diagonal. Can be used for Nigiri-zushi too.
Zuke - marinate the sashimi in the source made from soy source and mirin (sweeten sake) in 2:1 for about 1 hour. Can be used for Nigiri-zushi.
Tataki: slice them thin then chop them on a cutting board, then chop it with sliced spring onions together. Can be used for Gunkan-zushi (Ship style sushi).

Saba - Makarel 

Where to by: Whole from Tesco / ASDA fish counter
Risk level: Mid high
How often I can find fresh one: almost every week. Do not use them during hot summer.
Point to check: the fish eyes are clear and still fresh, blood eyes are OK. Skin surface are blue, shiny and smooth but tightly stretched - no winkles around the stomach. The meat is hard, cannot twisted easily before cut. When you cut, the meat does not split into small pieces.
How to prepare: Su-jime - cured and pickle in sushi vinegar. I might post the prep work on another day.
Use for Saba-zushi

Tai - Sea beam


Where to buy: ASDA fish counter
Risk level: Mid high
How often I can find fresh one: almost every week but do not do this during hot summer
Point to check: The fish eyes are clear and still fresh. Whole body is covered by clean scales, shiny and hard. When you slice the meat is slightly transparent.
How to prepare: Kobu-jime - cured and marinated by Kobu sea wead. I might put up the prep work on another day.
Use for Temari zushi - small ball sushi, nigiri, tai-chazuke

Iwashi - Sardine

Where to buy: ASDA fish counter
Risk level: flesh ones - High
How often I can find it fresh: almost never can find one fits for sashimi/fresh sushi, only few times in winter season. However I use regular fresh ones for Kaba-yaki instead of eel for sushi.
Point to check: Same as mackerel but difficult to determine if it fits to sushi or not before slicing them; once sliced them, meat should be totally smooth, doesn't get clumsy or whiter from the bit where you sliced. Guts are totally clean and farm, no wetly. When skin it out, the shiny bits remain on the meat side rather than skin easily.
How to prepare: If all above conditions met, then I can use it for fresh sashimi. If even slightly doesn't fit to the conditions then make it to Namerou - cured, sliced and marinated with sushi vinegar and miso (soy beans paste), mixed with minced ginger and spring onion.
With regular condition ones, use them for Kaba-yaki - fried and cooked in teriyaki source then use it for nigiri.

Sushi rice & Sushi vinegar


The preparation of sushi rice starts from before night, preparing the right amounts of sushi vinegar. The rice cooking takes about 1 hour, combining them and settle the rice takes another 2.5 hours before ready to make any sushi. However sushi rice is not ideal to leave it more than the day you made; so you may want to start preparing the rice from the morning of when you want to serve sushi.

Sushi vinegar

You can buy a bottle of pre-made "Sushi vinegar", but the home made one can make it even fit to your taste.
Below is my favorite balance, you may adjust to fit your taste, but don't reduce sugar too much as the sugar helps the sushi rice shiner and gathered well.
See the Rice part to calculate the required cups of rice then multiply below Ingredients by the number of cups.

Ingredients (for 1 cup of rice)
30g sugar (preferably the Japanese white sugar but it can be substituted by the granulated sugar)
10g salt
45ml rice vinegar

Method
Just mix them well in a large bowl and leave it over night.

Rice
How much Sushi rice should we prepare? I would say 2 cups a person. Unlike other dinner, when you make sushi, you most likely eat only sushi. Usually I cock 1.2 cups of rice per person to count but for sushi day, I cook the rice more.

Ingredients
# of cups rice as you need
A spoon of sake per pot
water as needed

Following the How to cook Japanese rice in a pot post, cook necessary amount of rice but only one change: after you measured the water just as the regular rice, then take out a tbsp of water from the pot then pour a tbsp of sake instead.

Combine them to prepare sushi rice
Combining the sushi vinegar and rice is a matter of speed. Second pair of hand is really helpful for this process if you are not used to it.

Ingredients
Cooked rice and sushi vinegar from above, or about 40ml regular bottle of sushi vinegar per cup of rice.

Tools you need:
- a bowl
The best if you have Handai - bamboo bowl like this:

If not, improvise by a large shallow bowl like this:
I'm using a bowl something like this; it was from Tesco long ago.
or a large Pyrex dish like this:


- a spoon
The best is to use bamboo or plastic shamoji spoon like this:

If not, improvise by a regular large serving spoon.
* Do not use a cooking wooden spoon.

- a fan
The best is to find a Japanese fan like this:

If not, improvise by... anything, like a folded news paper, a note book etc...

- a tea towel
Tea towel like this type - cotton, cheep, thin, without strings to come out - is the best:


Method
1. Prepare this just before rice is done: wet the tea towel with cold water and squeeze out water well. Wet the bowl and spoon under running cold water and drain out water easily.
2. Once rice is cooked, put all out the rice from the pot to the center of lightly wet bowl. (nicer if you can ask someone else to help this aside of you)
3. Immediately pour over the measured sushi vinegar all over the rice, then using a wet spoon, move the spoon as cut the mass of rice in to big slices from once side to other, like slicing the sushi vinegar into between rice grains.
4. Once you cutting through the mass of rice from once side to other, the rice should be kind of spread over the bowl; now using the spoon, turn the rice over from the bottom of the bowl, little by little (but quickly!).
If rice start to stick to the spoon, wet it again.
5. Turn the bowl 90 degree (nicer if you can ask someone else to help this aside of you) then repeat the slicing movement now with turning over to mix them; try not to leave some big mass of rice without cutting through. Repeat one more time if you need. The key is to mix the rice with sushi vinegar enough but not too much - too much mixing them makes too sticky rice and it doesn't shine.
6. Once they are mixed enough, then use a fan or any improvised product to run the wind over the rice for 10-20 sec. Turn over the rice using the spoon and repeat it again. (nicer if you can ask someone else to help in turn)
Point: run the wind from about 30 cm over the rice and move fan in large sections so the wind can hit all rice by every brow and take the steam off from the rice. By here you'll see the rice start to get shinier.
7. Now cover the top of the bowl by the wet towel, leave it at cool place (but not cold) over 2 hours. This is not only waiting for the rice to cool down but settling the vinegar into the rice.
8. Ready to use the sushi rice for any sushi cooking.

Japanese cooking tools - Houchou - Japanese cooking Knifes


The Japanese cooking knifes are generally called Houchou, which has totally different use from general European knifes. Houchou is designed to slice foods down against a cutting board in one go; wooden cutting boards are made softer than European cutting board in order to support the sharper but softer edge tips and make a clean slice surface and accurate cuts, where European knifes are generally designed to chop or grind foods down against a cutting board.
The Edge of many Japanese knifes are chisel grind style; however has very short edge on other side to support the smooth cut.

The Houchou used by Japanese chefs are made one type per one purpose usually; For soft meat, hard meat, meat with bone, for a small fish, big fish, bonny fish, leaf veges, root veges, specially for eels, tunas, puffer poison fish, octopus etc.
Therefore Houchou has many types and styles per different uses; however majority of us use only one type at home; Santoku (is the proper name even I didn't know till today,  but most of us just call it Houchou), shown the picture at the top of this page.
The Japanese knifes imported to UK are mostly in this style.
The main purpose for our knifes are categorized in three; for veges, for meats and for fish; this Santoku - Houchou is in the ideal shape and made to fit for all 3 different purposes by one.
It has the popular chisel grind style with short edge on the other side so it is easier to cut food in straight with clean cutting surface.
The most part of its blade is straight so it can slice veges against cutting board easily, or peal the veges in thin slices.
The blade body is thicker made than a vegetable knifes so it lasts longer and stronger against meat and soft bones to cut, but not thick as a meat knife so easier to use, the body gets thinner towards the point tip and the edge is slightly carved up so it's easier to slice in to fish meat and cut it out from thin bones.
This type of knifes are usually strong enough to cut chicken cartridges, thin bones around wing tip, fish bones, core of corns etc, but not strong enough to chop e.g. chicken thick bones, pork ribs or beef bones.
I use mostly only one of this type knife for all cooking, except some special occasions e.g. slicing a bread.

<Take care>
Because the edge is made in the chisel grind style, the edge gets dull quite often; proper way is to use the special sharping table stone, which may not be easy to find it outside of Japan.
In that case, don't use the knife sharpener for European knifes unless the knife states that is OK (some European made one do that); the most of Japanese knifes are softer than European knifes, the general sharpener in UK will just damage the edge and make it last the life of knife shorter.
Ideal way is using a back of tea or coffee cup; the one has a bit rough cut should do well.
Do this very carefully please.
Firstly sharpen the main grind side - against the edge of cup, place the edge a right-angle to the cup bottom, not totally flat parallel to the surface of the cup bottom but slightly angled just as the grind, slide the knife from bottom to top against the cup bottom. One way only. Do it few times, carefully. Do the same for the other side of edge once. Clean the knifes under running water, careful as the edge should be very sharp now.

Although above process works fine for most of general Japanese home use knifes, if you buy a real better Japanese knifes, you may find them rusts very quickly. Be aware the better knifes from proper Japanese knife makes uses high rate of carbon steel in order making the knife sharper but stronger; in the results those knifes are easier to rust. The knife must be kept dry after use all time, wash it immediately well after cutting lemons.

The sharp pint tip is usually even softer than other part; do not dry the knife in Utensil stand but lay the edge down on the aerial.

ひき肉のレタス巻き - Minced pork lettuce roll


This is my family recipe, it was my favourite dinner since I was small and today it’s my son's favourite. The picture is the meal that my son cooked because I was with cold yesterday. A bit of lazy part is to add green beans noodle, and that's optional. Otherwise it's very difficult to make it wrong. It’s nice and light meal, I usually serve this without anything else because when you dig in to this with your hands, you won’t need anything else.


Ingredients: (2-3 people)
500g minced pork
15cm bottom whiter part of leak minced
2 large slice of ginger minced 
2 medium size dried Shitake mushroom (see prep)
3 tbsp soy sauce
1 tbsp sake
2/3 Tbsp sesame oil
1 tbsp potato starch
salt & black pepper
1 large head of lettuce
1 small pack of glass noodles/green beans noodles (optional)
vegetable oil for deep fry (optional)


Preparation
1. In a small soup cup, place the dried Shitake mushrooms – stem side down, add a pinch of sugar (not included in the list of Ingredients) then pour some boiling hot water to cover the Shitake as much as they can float in the hot water. Leave it aside for about 15 min. Cut off the stems when it become enough soft.
* This is the quick way to restrain the Shitake - it is good enough when you want it for stir fry, etc. Otherwise it needs to be left in some cold water for over 1 hour - that drains better aromatic juice with complete Shitake taste.

2. Cut off the bottom stalk of the lettuce for about 0.5- 1cm, to loosen the first few leaves. Put it under running water, the stalk side up, then carefully remove the lettuce leaves one by one. Try not to break the leaves. Repeat the process until pealing all leaves. Leave it on a strainer to drain the water.

3. Chop the leak in to mince. Place the leak on a cutting board, hold the greener side of the stalk then cut a slit at the center along the leak stalk leaving but where you are holding without cutting it to pieces. Roll the stalk for 90 degree, do it again. Then make additional slits between the slits - so it will have a cut looks like an asterisk when you look the leak from the bottom. Now slice them in about 2-3mm from bottom side. Keep repeating this until all minced.

4. Chop ginger in to mince. Ginger has strings inside along with its growing direction. Unless you want to mince all the piece, you slice them in a right-angle to the string direction. Take off the first bits out (skin bits) then cut 2 of 2mm slices. Cut off the skin part, place one over another slice, then slice from one side to another to make 2mm threads. Turn them 90 degrees then cut them into cubes.

5. Once the Shitake mushroom is softened entirely until where was the stalk, then take them out from the water, squeeze them gently to drain out the liquid. On a cutting board, place them one over the other one, slice them into about 5mm threads. Turn them 90 degrees and cut them into cubes.


Method
1. Put all ingredients from the Ingredients list until salt in a bowl, following the list order. 
2. Mix them well using your hands. Leave it aside.

3. Optional step: deep frying the green beans noodles
It is nicer if you add some deep fried glass noodles, but this takes time. I do omit when I don’t have time, it is totally optional to add it or not.

3.0 Place a kitchen paper on strainer, ready another few kitchen papers aside of it.
3.1 Open the package, take the noodle out from the package, and take off the string holding the noodles together. Give some wagging to the mass and try to lose it a bit (don't need to be loosen all free, just to make it a bit loose so the oil can go into the center easier).  
3.2 Using a Chinese wok or a large deep pan heat up some vegetable oil, enough amount for deep frying the noodles (about at least 2 cups).
3.4 Wait until the oil gets enough hot. Firstly do the test: drop a small string of the noodle into the hot oil. If the heat is enough high, then the noodle should start popping to rough whiter and thicker noodles. If not, keep heating the oil until the noodle gets popped. Once the oil is enough heated then place the whole noodle mass in. Turn over the noodles in the oil few times and allow all around the noodle mass to pop. 
3.5 Once the popping stopped and see that the most of the noodles are popped, take the noodles out from the oil, keep it over the wok/pan for another 5-10 sec to drain the remaining oil out from the noodle well, then place it on the kitchen paper on the strainer. 
3.6 Using the extra 2 kitchen papers, wag the noodle and make them into loosen threads - be careful, the noodle must be very hot and some hot oil may come out! 
3.7 If the center of noodle mass remained not popped then put that remaining mass back in the hot oil and repeat the process again. 
3.8 You may find some center bits cannot pop at all - that's fine, once the noodles start to get brownish, then the noodles are fried enough anyway. You should be able to break that down to small pieces by the kitchen paper. 

4. If you've done the step 3, then take all oil out from the wok/pan to other pot, then place the pan on a hob and turn it on to high heat. Pour about 1 tbsp of oil in the wok/pan. 
If you skip the step 3, Place the Chinese wok or deep pan on a hob, turn the hob to high heat. Once the wok/pan is heated enough then pour about 3 tbsp of oil in the wok/pan. Move around the wok/pan to spread the oil all over the wok/pan. Discard 1/3 of the oil.
5. Put all the mixture of step 2 into the wok/pan. 
6. Using the turner, separate the mixture into smaller meat ball bits. Push down the mixture in the wok/pan, then cutting them through to small bits using the turner. Once the bottom side of minced pork are cooked, then using the turner, little by little turn them over roughly. Repeat separating them by the turner to small bits. If all became roughly a small bits, then stir fry until all get cooked.
7. Add the deep fried glass noodles into the wok/pan, stir fry them together for another 1 minute and done.
8. Serve the minced pork in a pot with few large spoons – the meat is nice serving in hot as well as cold depend on the weather. Serve the fresh lettuce separately. Everyone use your hands to build your own rolls.

* Additionz: I prefer to add some mayo in my roll. Chili oil is also nice if you like to have some kick. 

Monday 20 January 2014

Japanese Cream Bread

One of what I made on the last weekend.
Othe nice recipe from Japan. I'll post the detail later.

Sunday 19 January 2014

Japanese and Oriental ingredients: Rice vinegar

Rice vinegar

The Japanese rice vinegar has a gentle rice flavour with very light natural sweetness, light but stingy and clear sour taste. Basic one has not malted or sweetened. The clear taste of rice vinegar does not bother the food original taste.
Using the same basic rice vinegar, there are so many varieties of way to marinate ingredients; the vinegar is seasoned differently per the marinating ingredients, to suite the ingredients its taste.
For example, the vinegar used for sushi rice is not plane rice vinegar, but the one seasoned by sugar and salt. By the portion of sugar and soy source mixed with vinegar makes the basic few varieties. Mixing with flutes juice like lemon, or flutes meat like ume (salted plum) are the another popular style. 
Marinating food is one of very popular way to preserve food and kill bacteria, which is easier to grow under the Japanese high heat & humidity summer condition.

<Example products you can find in UK>
I have to say, I use only Mizkan brand. I never could accept any other makers taste as this is my family taste. But I think I'm not the only one.

Daily use: Mizkan Distilled White Vinegar
http://shop.waiyeehong.com/food-ingredients/sauces-oils/vinegars/distilled-white-vinegar
Honestly this type has lesser flavour but really cheaper. Yet the stingy vinegar sour taste gets much gentle than the western distilled white vinegars. For the heated menu like Sweet and Sour pork, this works well.

 Good: Mizkan Rice Vinegar (Most of Japanese grocery store has this product)

Has richer rice flavour, slightly sweeter and lesser stingy sour taste than above. Usually cooked with sugar and other ingredients for a very short period to control the stingy sour taste even more.
ASDA carries equivalent product:
http://groceries.asda.com/asda-webstore/landing/home.shtml#!product/57596457


Variety: Mizkan Sushi-zu (Seasoned vinegar/Sushi vinegar)
https://www.facebook.com/pages/Japanese-Oriental-Food-Shop-Mai-Doh/168054836579122

You can make your own Sushi-zu from above regular rice vinegar, but this is very convenient for daily use.
It has been seasoned by sugar and salt, and has lesser stingy sourness than above.
If you are looking for the rice vinegar for general salad, this is the one you like to buy.
Lately Tesco start to carry the next product:

Variety: Mizkan Powdered Sushi Vinegar Mix
http://www.tesco.com/groceries/Product/Details/?id=276785990
If you are novice making sushi rice, this powder style is easier to make sushi rice evenly.

For cooking
Commonly used for marinating vegetable, fish and sea food. Cooking meat with vinegar softens the meats. The sushi rice vinegar makes very simple and light tasting salad dressing. 

Other use
Lately vinegar is more likely to be used for cleaning household, just like the lemon juice.


Sunday 12 January 2014

Japanese and Oriental ingredients: Sake/Nihon shu (Japanese rice wine)

Sake/Nihon shu (Japanese rice wine)

Nihon shu, known as Sake in English world is a rice wine produced from Japanese rice in Japan.
It has sweetness and slight dry taste. Compare to regular wine, it does not have that much fruitiness and the gorgeous flavor. It doesn't have strong smell or flavor, that allows the liquor to supports the ingredients original taste stronger. It can be used for cooking as well as you can drink it cold, warm and hot.
It has variety of grade per the complication of the way to produce it, who produce it, and what kind of rice and ingredients are used. It is not always better the taste when the price is higher, it is selected by how you like the taste, much like general wines.
Typically the one produced by pure rice (Jun-mai shu) has more sweeter taste, the one longer processed one (Sei shu) has more dryer taste.

Be aware that the "cooking sake" we call is not a plain sake; generally it has been seasoned and flavored.
I would rather buy a cheapest sake to use for cooking rather than using the cooking sake for my dish.

<Example products you can find in UK>
Good: Sawano tsuru
I'm amaized and didnt know that Waitrose sales this product today and so reasonable price! Before, ASDA had carried a smaller bottle of below Takara product but apparently they don't do that anymore.
This one does really fit to your daily drink and for cooking.


Daily use: Takara ShoChikuBai (find in TK Trading and many Japanese groceries shop)

Just barely fit for your drinking (in my liking) but good for cooking.

Too good for cooking, just for drinking!: Hakkaisan

This is my best selection I can find in reasonable price in UK. It is a kind of Jun-mai shu so has light sweetness than dry ones but in a good balance.

Serving for drink
Because Sake has very light taste in general, it is better to be serve in the room temperature to enjoy its full flavor especially for the good ones. You may find it more dryer the taste when it is cooled; I like to serve very sweet flavor ones from refrigerator. Nice to serve it in cold with sushi or sashimi, that also reduce the smell of fish remains in your mouth (just like a grass of wine for a piece of cheese).
Serving sake in hot has totally different affect, it make the sake more stronger flavor and warms your body quickly. Nice to be served in this way with dry foods, strongly flavored meals (like yakitori, teriyaki).

For cooking
Commonly used for marinating meets before cook and making source (e.g. soba noodle source, nimono source, teriyaki source etc.). It is also used for cooking Sushi rice.

Japanese and Oriental ingredients: Shal Hsing Rice Wine (Chinese molted rice wine)

Shal Hsing Rice Wine

Shal Hsing Rice Wine is a product must have one if you want to cook Chinese foods.
It is popular for cooking as well as for drinking.

The liquor has a distinguished smell when it is cooked; you can say this is the smell of Chinese cousin.
Compare to the excellent smell, you may not find the taste significantly special when you try it from bottle. It is slightly bitter, molted flavor and very dry as no sweetness to feel.
However it gives total difference when it is cooked in a source or soup, and served warm to your mouth.

You can find this product in most of Chinese groceries stores such as here:
Wai Yee Hong

Lately Tesco start to carry this product, you can find in the world food section:
Tesco Groceries

Serving for drink
My preferred way to drink this is in hot. Warm the bottle (or a portion in a heat resistible ceramic bottle) in a pot of boiling water until bottle gets as hot as you need some towel to hold (Open the bottle cap a bit before you start heating!).
Serve it in a shot grass (heat resistible ones) with some spoons of crystal sugar. Mix them lightly before drink.

For cooking
There are so many Chinese famous dish cooked with this liquor, e.g. Sweet and Sour Pork, Stir-fried beef with black-been source, Steamed Whole Fish with Ginger and Spring Onion etc.
Adding the liquor to the food makes it gorgeous, the liqueur gives the food extra taste color and brightness.
It accelerate the feeling of warmness of the dish.


Japanese and oriental ingredients: Soy sauce

Soy sauce

Soy saucehas a lot of similarity with balsamic vinegar. It has sweetness, saltiness, smooth texture but with slight thickness, deep and complex flavor.
It has a lot of variety in kind, taste, maturity and specific category by region base. 
Both gets reduce the freshness and the flavor in quite a short time. Adding them to food adds up extra depth for the entire flavor.  
In Tokyo, many of us use the regular soy saucefor everything. For sushi, for cocking food, for dipping and all. Kansai - the west Japan uses light soy source more frequently. For specific cooking we use more specific varieties e.g. Tosa region soy sauce, dark soy sauce, Tamari (dark) soy source etc.

Regular soy sauce
This isn't really a category, but the most popularly used level of taste and thickness after excluding all specific ones. 
The soy source in bottle looks totally black, but if you put on a dish it has dark red-brown color, but unlike the real dark soy source we categories, the source is much liquidly and smooth.
There are a lot of different grade even in the same regular soy sauce, just as the proper balsamic vinegar.  The taste of soy sauce really varies just as its price. Honestly, the more expensive soy sauce you buy, the better the taste.

Good regular soy sauce tastes flesh, smooth, lightly sweet and not so salty, more than anything, it's tasty.
Cheep or old regular soy sauce test salty, tick, gets slightly sour, you can feel some dust of dried soy sauce in the liquid.

<Example products>
Very good: Kikkoman Tokusen Maldaizu Shoyu (extra selective whole soy beans soy source) 

The price is double from the one below product but the taste is equally better. If you really want to taste sushi better, you need one at your home. 

Daily use: Kikkoman Shoyu (Kikkoman soy source)

You can find a large bottle at any Asian/Oriental shops. 
Tesco and ASDA also sales the small serving bottles.

There are proper imported from Japan version, produced by EU / US version and from China version. Taste wise - you may not find that significant difference.

Soy sauce is very delicate, it require to be stored in a cool dark place.
I needed to store it in refrigerator when I was in Tokyo, now I can keep it in dark cool place is more than enough in England. The bottle needs to be capped firmly well as it also changes its taste by air.
All soy sauce must be used when it is flesh because the soy sauce taste changes significantly by time. 
Full large bottles are ideally to be spent within a month or less. The serving style small bottles should be spent in a week or so.
Saying this, I know it's difficult for many people to spend that quick. You can make the taste last longer if you cover the top of bottle with clear wrap well (for the serving small bottles), store the bottles in your refrigerator when you don't use.
For me, I buy just a daily use one, reason because I cannot cook sushi or sashimi as frequently as I can spend the whole bottle of good soy source up before it changes the taste. 


My home-adapted-style Falafel

My adapted version of Falafel recipe. No deep fry and righter spicing.

Ingredients
240g (1 can) chickpea
1/2 small onion
2 garlic cloves crushed and chopped
about 1/4 cup flat leaf parsley (pick only leaf part)
1 tbsp flour
1 tsp smoked paprika powder
a pinch of grand cumin
a pinch of grand coriander seeds
a pinch of grand cardamon seeds
1 tsp salt

Method
1. Put all ingredients in a food processor, in the following listed order: the onion, garlic cloves, canned chickpeas, flat leaf parsley, flour, paprika powder, grand cumin, grand coriander seeds and grand cardamon seeds.
Start with staggering chop then push down the ingredients stack at the side of food processor, make sure there is no big bits remained but all processed well and the chickpea bits become about couscous size.
2. Take out all in a bowl then cover the bowl with plastic wrap. Keep it in refrigerate for 1-2 hours.
3. The mixture should become slightly tough and easier to deal with after keeping in refrigerator. By a table spoon, Scoop enough amount of mixture out from ball, make a small ball on your palm. Not like meet ball as it is much easier to break into pieces, like to put them together in a round shape. Place them on a backing tray, which has covered with aluminium foil and and spread a little amount of olive oil. Keep them apart each.
4. Splay or splash very little amount of olive oil on top of each balls.
5. Place the tray in oven heated at 200c, back them for about 15 to 20 minutes until the top of the balls become brown, then turn them over (it may stack to foil, then use spoon to move them like scraping the bottom) keep it in oven for another 10 min until the top become golden.
6. Serve them hot with warm pita breads.

This recipe is based on a very nice recipe with pictures at below web site:
http://theshiksa.com/2011/01/05/falafel/


Friday 10 January 2014

Pork mince and chipolatas in pita bread

This recipe is tribute to the very nice pork mice and cheese Panini we had on 25th of December last year, at the center of Paris (right next corner from St. Paul) when nothing much else was opening - which somehow we knew it but had to make the unexpected journey. It was really lovely when you were so starving and desperate to find an opening shop with affordable and reasonable food.

Ingredients
(for about 6 pita breads sandwiches)
500g minced pork
a pack (300g) of pork & chorizo chipolatas or any other sausages
a pack (6 pieces) of large pita breads
1 large onion sliced
1 clove of garlic chopped
2 tsp of flour
1/2 cup of white wine
some water
pinch of cumin & garan-masala
olive oil, salt and black pepper
some salad - slice of tomatoes, cucumbers, onions and lettuce for put in the pita bread with meat
some shredded cheese if you like

Method
0. Put the chipolatas/sausage in oven about 200c until they are cocked (start cocking later to be served warm with the below pork mince).
1. Heat a pan and add about 1Tbsp of oil in it.
2. Stir fry the onion and garlic until onion get soft.
4. Add the minced pork in, separate them to small bits using turner.
5. Before the meat gets totally cocked, add some cumin and garam-masala and keep stirring them.
6. Once the meet gets totally cocked, put the flour all over the meats, then stir fry until you cannot see any flour dust in the pan for about 1/2 minutes.
7. Pour in the white wine and mix them well. add some water if the mixture is still too dry.
8. Add salt and black pepper to your taste.
9. Put pita bread in oven for few minutes just to warm them up.

Serve them hot; put them all on table and ask everyone to build their own sandwiches.

Home made Humos

This is a recipe based on many other people's recipes, adjusted to the taste that I really liked when I tried it in a nice small Lebanese restaurant.

Ingredients
1/2 can (200g) of chickpea drained
juice of about 1/2 lemon
2 Tbsp of tahini paste (or sesame paste) - measure without oil
2 cloves of garlic
about 1/4 cup of extra-virgin olive oil (or more depends on how it goes)
small pinch of ground cumin
salt and black pepper
some paprika and extra-virgin olive oil for garnish

Preparation
 This is most painful part. Usually, canned chickpeas have a thin skin wrapping each piece.
After draining the chickpeas, rinse them and peel off the skin one by one.
They usually has a slit so if you hold a piece between your fingers and push a bit, it should be peeled off very easily. Discard the skins.

Method
1. In food processor, put the garlic cloves and mince it well.
2. Reserve few chickpeas for garnish, put  the rest of all chickpeas in the food processer then blend them until smooth.
3. Add the lemon juice little in once and blend them, gradually add all the juice in. Check the taste time to time and make sure the puree doesn’t get too sour.
4. Put the tahini paste and cumin in the food processer then blend them until they are mixed well.
5. Add the olive oil little in once and blend them, keep adding the oil until the puree gets to the smoothness and softness you like.
6. Add some salt and black pepper to your taste.
7. Pour the humos mixture into a dish/small bowl, make the humos shallow sloop down to the center of the dish. Pat some paprika around the center, put on the reserved chickpeas, then pour over the extra-virgin olive oil to cover the top of humos - so the humos gets intact from air and remain smooth.

Thursday 9 January 2014

Sweet and Sour Pork

This is a recipe I learnt from one of Chinese blog, the very basic but must try recipe.
Everyone I served at my home asked me to share this. The best thing is, it's a nice home made "not too oily" version.

Ingredients
(for serving 4 people or 3 hungry people like my family)
300g tick slices of pork loin
1 large white onion
2 bell peppers (mainly green but mixing with few other colours makes nicer)
1 carrot

For sauce
12 Tbsp rice vinegar
12 Tbsp sugar
6 Tbsp soy sauce
3 Tbsp Chinese Shal Hsing Rice Wine
6 Tbsp water
2 Tbsp potato starch

For butter
1/2 whisked egg
2 Tbsp Sake (Japanese rice wine)
7 Tbsp potato starch
Salt and black pepper
Enough amount of vegetable oil for deep fry and stir fry.

About this cocking tools
For deep fry part: Ideal to use a large Chinese wok, but can be improvised by a deep and thin pot.
For stir fry part: Ideal to use a large Chinese wok, but can be improvised by a large pan.
A metal slotted spoon is nice to have for keeping the deep fry process quicker and dry the pieces.

Preparations
1. Trim the top and bottom of onion, cut it in half, peel the outer skin, then peel them to individual layers. cut them in almost same size triangle shape.


2. Trim the top and bottom of bell pepper, cut it in half, take off all seeds and white bits in center. Strip off any white part inside by knife. Cut them in same triangle shape as onion.
3. Skin the carrot then trip off the top and end bits, Slice it in about 2-3mm thin, boil them in slightly salted hot water for about 1/2 minutes then drain them on a strainer.
4. Now pork loin slices. On the surface of each slice, make very shallow cuts (about few mm deep) in 5 mm apart each using sharp knife, like narrow strips, from one side to other side. Now do the same in other angle to make cross-cut lines. Do the same on the other side of slices. Repeat on all pieces.
5. Cut the pork loin slices (with now shallow cross cuts in) into about 2-3cm triangle pieces.
6. Season the pork loin pieces with Japanese rice liquor, salt and black pepper then put it aside.
7. Mix all ingredients for sauce in a bowl. Potato starch will sink to the bottom of bowl so you will need to mix it again before use.

Deep frying pork
1. Put the pork loin pieces in a bowl, pour in the whisked egg, mix them to court all pieces, put the potato starch over it, mix them using spoon to form a butter court over all pieces evenly.
2. Ideal to use a large Chinese wok, but can be improvised by a deep and thin pot.
If using a wok, heat the wok to peeping hot, keep the heat on still high, then carefully pour in enough amount of cold oil to deep fry them (about at least the depth of all pork loin pieces can fit and be under the oil).
If using a pot, just poor a cold oil in the pot and start heating up by high heat.
3. Don't wait the oil to get too heated, but start dropping all buttered pork loin pieces in to the wok one by one, apart from each other as much as you can.
If you are using a pot, you cannot do like this, so don't worry but just deep fry them in several times.
4. Once the pieces get golden and start hovering around, scoop them out in few times, drain the oil well by hitting the wok/pot side few times, then put them out on  kitchen papers or strainer.

Completing the dish
1. If you are using a wok, take out all oil and clean it once, put on high heat to heat it up again till peeping hot.
If you are using a pan, just heat it up until peeping hot too.
2. Put about 3 Tbsp of oil in the wok/pan, well spread it through all over the wok/pan's surface, then drain out about 2/3 of oil to discard (careful, the oil gets really hot).
3. Put in the deep fried pork and boiled carrot to the heated wok/pan, keep stirring them for few seconds, then add onions and bell peppers, keep stirring them. Take all out to a large dish when just the bell peppers start to change its colour brighter, about in 10sec.
4. Mix well again and pour the mixture of sauce ingredients in the emptied wok/pan, put the pan on medium heat then keep stirring the sauce using a wooden spoon until the soured start get sloppy, then put back all what you stir fried and left on a large dish back in to the wok/pan.
5. Stir them to dress all pieces with the sloppy sauce.
6. Serve it hot. Nice to serve this with some steamed rice.