Sunday, 12 January 2014

Japanese and Oriental ingredients: Sake/Nihon shu (Japanese rice wine)

Sake/Nihon shu (Japanese rice wine)

Nihon shu, known as Sake in English world is a rice wine produced from Japanese rice in Japan.
It has sweetness and slight dry taste. Compare to regular wine, it does not have that much fruitiness and the gorgeous flavor. It doesn't have strong smell or flavor, that allows the liquor to supports the ingredients original taste stronger. It can be used for cooking as well as you can drink it cold, warm and hot.
It has variety of grade per the complication of the way to produce it, who produce it, and what kind of rice and ingredients are used. It is not always better the taste when the price is higher, it is selected by how you like the taste, much like general wines.
Typically the one produced by pure rice (Jun-mai shu) has more sweeter taste, the one longer processed one (Sei shu) has more dryer taste.

Be aware that the "cooking sake" we call is not a plain sake; generally it has been seasoned and flavored.
I would rather buy a cheapest sake to use for cooking rather than using the cooking sake for my dish.

<Example products you can find in UK>
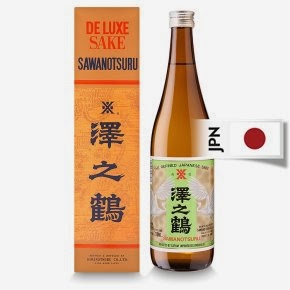
Good: Sawano tsuru
I'm amaized and didnt know that Waitrose sales this product today and so reasonable price! Before, ASDA had carried a smaller bottle of below Takara product but apparently they don't do that anymore.
This one does really fit to your daily drink and for cooking.


Daily use: Takara ShoChikuBai (find in TK Trading and many Japanese groceries shop)

Just barely fit for your drinking (in my liking) but good for cooking.

Too good for cooking, just for drinking!: Hakkaisan

This is my best selection I can find in reasonable price in UK. It is a kind of Jun-mai shu so has light sweetness than dry ones but in a good balance.

Serving for drink
Because Sake has very light taste in general, it is better to be serve in the room temperature to enjoy its full flavor especially for the good ones. You may find it more dryer the taste when it is cooled; I like to serve very sweet flavor ones from refrigerator. Nice to serve it in cold with sushi or sashimi, that also reduce the smell of fish remains in your mouth (just like a grass of wine for a piece of cheese).
Serving sake in hot has totally different affect, it make the sake more stronger flavor and warms your body quickly. Nice to be served in this way with dry foods, strongly flavored meals (like yakitori, teriyaki).

For cooking
Commonly used for marinating meets before cook and making source (e.g. soba noodle source, nimono source, teriyaki source etc.). It is also used for cooking Sushi rice.

Japanese and Oriental ingredients: Shal Hsing Rice Wine (Chinese molted rice wine)

Shal Hsing Rice Wine

Shal Hsing Rice Wine is a product must have one if you want to cook Chinese foods.
It is popular for cooking as well as for drinking.

The liquor has a distinguished smell when it is cooked; you can say this is the smell of Chinese cousin.
Compare to the excellent smell, you may not find the taste significantly special when you try it from bottle. It is slightly bitter, molted flavor and very dry as no sweetness to feel.
However it gives total difference when it is cooked in a source or soup, and served warm to your mouth.

You can find this product in most of Chinese groceries stores such as here:
Wai Yee Hong

Lately Tesco start to carry this product, you can find in the world food section:
Tesco Groceries

Serving for drink
My preferred way to drink this is in hot. Warm the bottle (or a portion in a heat resistible ceramic bottle) in a pot of boiling water until bottle gets as hot as you need some towel to hold (Open the bottle cap a bit before you start heating!).
Serve it in a shot grass (heat resistible ones) with some spoons of crystal sugar. Mix them lightly before drink.

For cooking
There are so many Chinese famous dish cooked with this liquor, e.g. Sweet and Sour Pork, Stir-fried beef with black-been source, Steamed Whole Fish with Ginger and Spring Onion etc.
Adding the liquor to the food makes it gorgeous, the liqueur gives the food extra taste color and brightness.
It accelerate the feeling of warmness of the dish.


Japanese and oriental ingredients: Soy sauce

Soy sauce

Soy saucehas a lot of similarity with balsamic vinegar. It has sweetness, saltiness, smooth texture but with slight thickness, deep and complex flavor.
It has a lot of variety in kind, taste, maturity and specific category by region base. 
Both gets reduce the freshness and the flavor in quite a short time. Adding them to food adds up extra depth for the entire flavor.  
In Tokyo, many of us use the regular soy saucefor everything. For sushi, for cocking food, for dipping and all. Kansai - the west Japan uses light soy source more frequently. For specific cooking we use more specific varieties e.g. Tosa region soy sauce, dark soy sauce, Tamari (dark) soy source etc.

Regular soy sauce
This isn't really a category, but the most popularly used level of taste and thickness after excluding all specific ones. 
The soy source in bottle looks totally black, but if you put on a dish it has dark red-brown color, but unlike the real dark soy source we categories, the source is much liquidly and smooth.
There are a lot of different grade even in the same regular soy sauce, just as the proper balsamic vinegar.  The taste of soy sauce really varies just as its price. Honestly, the more expensive soy sauce you buy, the better the taste.

Good regular soy sauce tastes flesh, smooth, lightly sweet and not so salty, more than anything, it's tasty.
Cheep or old regular soy sauce test salty, tick, gets slightly sour, you can feel some dust of dried soy sauce in the liquid.

<Example products>
Very good: Kikkoman Tokusen Maldaizu Shoyu (extra selective whole soy beans soy source) 

The price is double from the one below product but the taste is equally better. If you really want to taste sushi better, you need one at your home. 

Daily use: Kikkoman Shoyu (Kikkoman soy source)

You can find a large bottle at any Asian/Oriental shops. 
Tesco and ASDA also sales the small serving bottles.

There are proper imported from Japan version, produced by EU / US version and from China version. Taste wise - you may not find that significant difference.

Soy sauce is very delicate, it require to be stored in a cool dark place.
I needed to store it in refrigerator when I was in Tokyo, now I can keep it in dark cool place is more than enough in England. The bottle needs to be capped firmly well as it also changes its taste by air.
All soy sauce must be used when it is flesh because the soy sauce taste changes significantly by time. 
Full large bottles are ideally to be spent within a month or less. The serving style small bottles should be spent in a week or so.
Saying this, I know it's difficult for many people to spend that quick. You can make the taste last longer if you cover the top of bottle with clear wrap well (for the serving small bottles), store the bottles in your refrigerator when you don't use.
For me, I buy just a daily use one, reason because I cannot cook sushi or sashimi as frequently as I can spend the whole bottle of good soy source up before it changes the taste. 


My home-adapted-style Falafel

My adapted version of Falafel recipe. No deep fry and righter spicing.

Ingredients
240g (1 can) chickpea
1/2 small onion
2 garlic cloves crushed and chopped
about 1/4 cup flat leaf parsley (pick only leaf part)
1 tbsp flour
1 tsp smoked paprika powder
a pinch of grand cumin
a pinch of grand coriander seeds
a pinch of grand cardamon seeds
1 tsp salt

Method
1. Put all ingredients in a food processor, in the following listed order: the onion, garlic cloves, canned chickpeas, flat leaf parsley, flour, paprika powder, grand cumin, grand coriander seeds and grand cardamon seeds.
Start with staggering chop then push down the ingredients stack at the side of food processor, make sure there is no big bits remained but all processed well and the chickpea bits become about couscous size.
2. Take out all in a bowl then cover the bowl with plastic wrap. Keep it in refrigerate for 1-2 hours.
3. The mixture should become slightly tough and easier to deal with after keeping in refrigerator. By a table spoon, Scoop enough amount of mixture out from ball, make a small ball on your palm. Not like meet ball as it is much easier to break into pieces, like to put them together in a round shape. Place them on a backing tray, which has covered with aluminium foil and and spread a little amount of olive oil. Keep them apart each.
4. Splay or splash very little amount of olive oil on top of each balls.
5. Place the tray in oven heated at 200c, back them for about 15 to 20 minutes until the top of the balls become brown, then turn them over (it may stack to foil, then use spoon to move them like scraping the bottom) keep it in oven for another 10 min until the top become golden.
6. Serve them hot with warm pita breads.

This recipe is based on a very nice recipe with pictures at below web site:
http://theshiksa.com/2011/01/05/falafel/


Friday, 10 January 2014

Pork mince and chipolatas in pita bread

This recipe is tribute to the very nice pork mice and cheese Panini we had on 25th of December last year, at the center of Paris (right next corner from St. Paul) when nothing much else was opening - which somehow we knew it but had to make the unexpected journey. It was really lovely when you were so starving and desperate to find an opening shop with affordable and reasonable food.

Ingredients
(for about 6 pita breads sandwiches)
500g minced pork
a pack (300g) of pork & chorizo chipolatas or any other sausages
a pack (6 pieces) of large pita breads
1 large onion sliced
1 clove of garlic chopped
2 tsp of flour
1/2 cup of white wine
some water
pinch of cumin & garan-masala
olive oil, salt and black pepper
some salad - slice of tomatoes, cucumbers, onions and lettuce for put in the pita bread with meat
some shredded cheese if you like

Method
0. Put the chipolatas/sausage in oven about 200c until they are cocked (start cocking later to be served warm with the below pork mince).
1. Heat a pan and add about 1Tbsp of oil in it.
2. Stir fry the onion and garlic until onion get soft.
4. Add the minced pork in, separate them to small bits using turner.
5. Before the meat gets totally cocked, add some cumin and garam-masala and keep stirring them.
6. Once the meet gets totally cocked, put the flour all over the meats, then stir fry until you cannot see any flour dust in the pan for about 1/2 minutes.
7. Pour in the white wine and mix them well. add some water if the mixture is still too dry.
8. Add salt and black pepper to your taste.
9. Put pita bread in oven for few minutes just to warm them up.

Serve them hot; put them all on table and ask everyone to build their own sandwiches.

Home made Humos

This is a recipe based on many other people's recipes, adjusted to the taste that I really liked when I tried it in a nice small Lebanese restaurant.

Ingredients
1/2 can (200g) of chickpea drained
juice of about 1/2 lemon
2 Tbsp of tahini paste (or sesame paste) - measure without oil
2 cloves of garlic
about 1/4 cup of extra-virgin olive oil (or more depends on how it goes)
small pinch of ground cumin
salt and black pepper
some paprika and extra-virgin olive oil for garnish

Preparation
 This is most painful part. Usually, canned chickpeas have a thin skin wrapping each piece.
After draining the chickpeas, rinse them and peel off the skin one by one.
They usually has a slit so if you hold a piece between your fingers and push a bit, it should be peeled off very easily. Discard the skins.

Method
1. In food processor, put the garlic cloves and mince it well.
2. Reserve few chickpeas for garnish, put  the rest of all chickpeas in the food processer then blend them until smooth.
3. Add the lemon juice little in once and blend them, gradually add all the juice in. Check the taste time to time and make sure the puree doesn’t get too sour.
4. Put the tahini paste and cumin in the food processer then blend them until they are mixed well.
5. Add the olive oil little in once and blend them, keep adding the oil until the puree gets to the smoothness and softness you like.
6. Add some salt and black pepper to your taste.
7. Pour the humos mixture into a dish/small bowl, make the humos shallow sloop down to the center of the dish. Pat some paprika around the center, put on the reserved chickpeas, then pour over the extra-virgin olive oil to cover the top of humos - so the humos gets intact from air and remain smooth.

Thursday, 9 January 2014

Sweet and Sour Pork

This is a recipe I learnt from one of Chinese blog, the very basic but must try recipe.
Everyone I served at my home asked me to share this. The best thing is, it's a nice home made "not too oily" version.

Ingredients
(for serving 4 people or 3 hungry people like my family)
300g tick slices of pork loin
1 large white onion
2 bell peppers (mainly green but mixing with few other colours makes nicer)
1 carrot

For sauce
12 Tbsp rice vinegar
12 Tbsp sugar
6 Tbsp soy sauce
3 Tbsp Chinese Shal Hsing Rice Wine
6 Tbsp water
2 Tbsp potato starch

For butter
1/2 whisked egg
2 Tbsp Sake (Japanese rice wine)
7 Tbsp potato starch
Salt and black pepper
Enough amount of vegetable oil for deep fry and stir fry.

About this cocking tools
For deep fry part: Ideal to use a large Chinese wok, but can be improvised by a deep and thin pot.
For stir fry part: Ideal to use a large Chinese wok, but can be improvised by a large pan.
A metal slotted spoon is nice to have for keeping the deep fry process quicker and dry the pieces.

Preparations
1. Trim the top and bottom of onion, cut it in half, peel the outer skin, then peel them to individual layers. cut them in almost same size triangle shape.


2. Trim the top and bottom of bell pepper, cut it in half, take off all seeds and white bits in center. Strip off any white part inside by knife. Cut them in same triangle shape as onion.
3. Skin the carrot then trip off the top and end bits, Slice it in about 2-3mm thin, boil them in slightly salted hot water for about 1/2 minutes then drain them on a strainer.
4. Now pork loin slices. On the surface of each slice, make very shallow cuts (about few mm deep) in 5 mm apart each using sharp knife, like narrow strips, from one side to other side. Now do the same in other angle to make cross-cut lines. Do the same on the other side of slices. Repeat on all pieces.
5. Cut the pork loin slices (with now shallow cross cuts in) into about 2-3cm triangle pieces.
6. Season the pork loin pieces with Japanese rice liquor, salt and black pepper then put it aside.
7. Mix all ingredients for sauce in a bowl. Potato starch will sink to the bottom of bowl so you will need to mix it again before use.

Deep frying pork
1. Put the pork loin pieces in a bowl, pour in the whisked egg, mix them to court all pieces, put the potato starch over it, mix them using spoon to form a butter court over all pieces evenly.
2. Ideal to use a large Chinese wok, but can be improvised by a deep and thin pot.
If using a wok, heat the wok to peeping hot, keep the heat on still high, then carefully pour in enough amount of cold oil to deep fry them (about at least the depth of all pork loin pieces can fit and be under the oil).
If using a pot, just poor a cold oil in the pot and start heating up by high heat.
3. Don't wait the oil to get too heated, but start dropping all buttered pork loin pieces in to the wok one by one, apart from each other as much as you can.
If you are using a pot, you cannot do like this, so don't worry but just deep fry them in several times.
4. Once the pieces get golden and start hovering around, scoop them out in few times, drain the oil well by hitting the wok/pot side few times, then put them out on  kitchen papers or strainer.

Completing the dish
1. If you are using a wok, take out all oil and clean it once, put on high heat to heat it up again till peeping hot.
If you are using a pan, just heat it up until peeping hot too.
2. Put about 3 Tbsp of oil in the wok/pan, well spread it through all over the wok/pan's surface, then drain out about 2/3 of oil to discard (careful, the oil gets really hot).
3. Put in the deep fried pork and boiled carrot to the heated wok/pan, keep stirring them for few seconds, then add onions and bell peppers, keep stirring them. Take all out to a large dish when just the bell peppers start to change its colour brighter, about in 10sec.
4. Mix well again and pour the mixture of sauce ingredients in the emptied wok/pan, put the pan on medium heat then keep stirring the sauce using a wooden spoon until the soured start get sloppy, then put back all what you stir fried and left on a large dish back in to the wok/pan.
5. Stir them to dress all pieces with the sloppy sauce.
6. Serve it hot. Nice to serve this with some steamed rice.