Monday, 27 January 2014

Tiramisu


I made this last week, following the recipe from this web page - indulgent one, using my friend's home produced eggs. Very nice recipe, perfectly fit to what I wanted to eat.
Unforgettable perfect slice.

Fish for sushi - fish in UK market

You can find very nice sushi ready fish blocks from proper Japanese glossary shops, but they are very expensive.
Whenever I see really fresh fish in usual super market, I've been trying them if they can fit to make some sushi.
This is my note to keep record of fish that worked well with sushi.
* Description below does not guarantee anything for suitableness of fish to eat for sushi, use them on your own risk. I do take risk yes, I never had food poisoning by my sushi yet.

Shake - Salmon

Where to buy: Smoked salmon - any super market. Whole salmon - ASDA fish counter
Risk level: Smoked salmon - very low / fresh salmon - low as long as the salmon is from UK
How often I can find fresh ones: almost every week
Point to check: Smoked salmon - see the package. Fresh salmon - Cannot use the wild salmon; the salmon in UK market coming from Scotland are not wild. Check at the fish counter to be sure. The fish eyes are clear and still fresh, blood eyes are OK. Whole body is covered by clean scales, shiny silver, the body is springy and hard.
When you cut, the orange meat and white strips are clearly separated and springy, the cut surface is slightly shine by the fish natural oil.
How to prepare: Smoked salmon - just from package. Nice to make Oshi-zushi - pressed sushi.
Fresh salmon - If you like to make sure like me, freeze the center chunk of half side (after taken the skin and bone) once then slice when the chunk start to melt in to Shashimi. Detail - I might post the detail in another day.

Maguro - Tuna

Where to buy: slice from ASDA fish counter
Sainsbury used to carry very fresh Tuna slices in pack before, but no longer that case. Lately ASDA carries better slices on their fish counter in Swindon. They usually defreezing the next batch of slices behind the shop, you can ask them to check if there is any just ready ones nicely.
Risk level: Low
How often I can find fresh one: almost every week
Point to check: The surface of cut is shiny and can see something like rainbow effect. The cut corners are sharp, colour of fish is not only red but has some transparency.
How to prepare: Sashimi - Slice them in a right angle to thin strings between meat, slightly diagonal. Can be used for Nigiri-zushi too.
Zuke - marinate the sashimi in the source made from soy source and mirin (sweeten sake) in 2:1 for about 1 hour. Can be used for Nigiri-zushi.
Tataki: slice them thin then chop them on a cutting board, then chop it with sliced spring onions together. Can be used for Gunkan-zushi (Ship style sushi).

Saba - Makarel 

Where to by: Whole from Tesco / ASDA fish counter
Risk level: Mid high
How often I can find fresh one: almost every week. Do not use them during hot summer.
Point to check: the fish eyes are clear and still fresh, blood eyes are OK. Skin surface are blue, shiny and smooth but tightly stretched - no winkles around the stomach. The meat is hard, cannot twisted easily before cut. When you cut, the meat does not split into small pieces.
How to prepare: Su-jime - cured and pickle in sushi vinegar. I might post the prep work on another day.
Use for Saba-zushi

Tai - Sea beam


Where to buy: ASDA fish counter
Risk level: Mid high
How often I can find fresh one: almost every week but do not do this during hot summer
Point to check: The fish eyes are clear and still fresh. Whole body is covered by clean scales, shiny and hard. When you slice the meat is slightly transparent.
How to prepare: Kobu-jime - cured and marinated by Kobu sea wead. I might put up the prep work on another day.
Use for Temari zushi - small ball sushi, nigiri, tai-chazuke

Iwashi - Sardine

Where to buy: ASDA fish counter
Risk level: flesh ones - High
How often I can find it fresh: almost never can find one fits for sashimi/fresh sushi, only few times in winter season. However I use regular fresh ones for Kaba-yaki instead of eel for sushi.
Point to check: Same as mackerel but difficult to determine if it fits to sushi or not before slicing them; once sliced them, meat should be totally smooth, doesn't get clumsy or whiter from the bit where you sliced. Guts are totally clean and farm, no wetly. When skin it out, the shiny bits remain on the meat side rather than skin easily.
How to prepare: If all above conditions met, then I can use it for fresh sashimi. If even slightly doesn't fit to the conditions then make it to Namerou - cured, sliced and marinated with sushi vinegar and miso (soy beans paste), mixed with minced ginger and spring onion.
With regular condition ones, use them for Kaba-yaki - fried and cooked in teriyaki source then use it for nigiri.

Sushi rice & Sushi vinegar


The preparation of sushi rice starts from before night, preparing the right amounts of sushi vinegar. The rice cooking takes about 1 hour, combining them and settle the rice takes another 2.5 hours before ready to make any sushi. However sushi rice is not ideal to leave it more than the day you made; so you may want to start preparing the rice from the morning of when you want to serve sushi.

Sushi vinegar

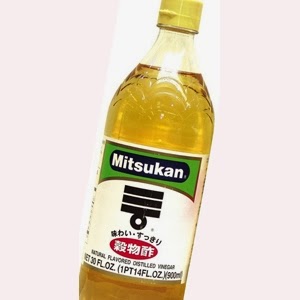
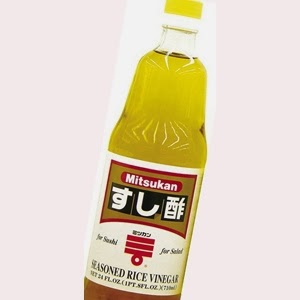
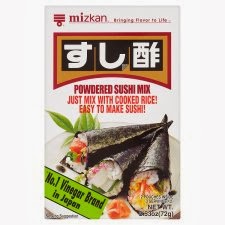
You can buy a bottle of pre-made "Sushi vinegar", but the home made one can make it even fit to your taste.
Below is my favorite balance, you may adjust to fit your taste, but don't reduce sugar too much as the sugar helps the sushi rice shiner and gathered well.
See the Rice part to calculate the required cups of rice then multiply below Ingredients by the number of cups.

Ingredients (for 1 cup of rice)
30g sugar (preferably the Japanese white sugar but it can be substituted by the granulated sugar)
10g salt
45ml rice vinegar

Method
Just mix them well in a large bowl and leave it over night.

Rice
How much Sushi rice should we prepare? I would say 2 cups a person. Unlike other dinner, when you make sushi, you most likely eat only sushi. Usually I cock 1.2 cups of rice per person to count but for sushi day, I cook the rice more.

Ingredients
# of cups rice as you need
A spoon of sake per pot
water as needed

Following the How to cook Japanese rice in a pot post, cook necessary amount of rice but only one change: after you measured the water just as the regular rice, then take out a tbsp of water from the pot then pour a tbsp of sake instead.

Combine them to prepare sushi rice
Combining the sushi vinegar and rice is a matter of speed. Second pair of hand is really helpful for this process if you are not used to it.

Ingredients
Cooked rice and sushi vinegar from above, or about 40ml regular bottle of sushi vinegar per cup of rice.

Tools you need:
- a bowl
The best if you have Handai - bamboo bowl like this:

If not, improvise by a large shallow bowl like this:
I'm using a bowl something like this; it was from Tesco long ago.
or a large Pyrex dish like this:


- a spoon
The best is to use bamboo or plastic shamoji spoon like this:

If not, improvise by a regular large serving spoon.
* Do not use a cooking wooden spoon.

- a fan
The best is to find a Japanese fan like this:

If not, improvise by... anything, like a folded news paper, a note book etc...

- a tea towel
Tea towel like this type - cotton, cheep, thin, without strings to come out - is the best:


Method
1. Prepare this just before rice is done: wet the tea towel with cold water and squeeze out water well. Wet the bowl and spoon under running cold water and drain out water easily.
2. Once rice is cooked, put all out the rice from the pot to the center of lightly wet bowl. (nicer if you can ask someone else to help this aside of you)
3. Immediately pour over the measured sushi vinegar all over the rice, then using a wet spoon, move the spoon as cut the mass of rice in to big slices from once side to other, like slicing the sushi vinegar into between rice grains.
4. Once you cutting through the mass of rice from once side to other, the rice should be kind of spread over the bowl; now using the spoon, turn the rice over from the bottom of the bowl, little by little (but quickly!).
If rice start to stick to the spoon, wet it again.
5. Turn the bowl 90 degree (nicer if you can ask someone else to help this aside of you) then repeat the slicing movement now with turning over to mix them; try not to leave some big mass of rice without cutting through. Repeat one more time if you need. The key is to mix the rice with sushi vinegar enough but not too much - too much mixing them makes too sticky rice and it doesn't shine.
6. Once they are mixed enough, then use a fan or any improvised product to run the wind over the rice for 10-20 sec. Turn over the rice using the spoon and repeat it again. (nicer if you can ask someone else to help in turn)
Point: run the wind from about 30 cm over the rice and move fan in large sections so the wind can hit all rice by every brow and take the steam off from the rice. By here you'll see the rice start to get shinier.
7. Now cover the top of the bowl by the wet towel, leave it at cool place (but not cold) over 2 hours. This is not only waiting for the rice to cool down but settling the vinegar into the rice.
8. Ready to use the sushi rice for any sushi cooking.

Japanese cooking tools - Houchou - Japanese cooking Knifes


The Japanese cooking knifes are generally called Houchou, which has totally different use from general European knifes. Houchou is designed to slice foods down against a cutting board in one go; wooden cutting boards are made softer than European cutting board in order to support the sharper but softer edge tips and make a clean slice surface and accurate cuts, where European knifes are generally designed to chop or grind foods down against a cutting board.
The Edge of many Japanese knifes are chisel grind style; however has very short edge on other side to support the smooth cut.

The Houchou used by Japanese chefs are made one type per one purpose usually; For soft meat, hard meat, meat with bone, for a small fish, big fish, bonny fish, leaf veges, root veges, specially for eels, tunas, puffer poison fish, octopus etc.
Therefore Houchou has many types and styles per different uses; however majority of us use only one type at home; Santoku (is the proper name even I didn't know till today,  but most of us just call it Houchou), shown the picture at the top of this page.
The Japanese knifes imported to UK are mostly in this style.
The main purpose for our knifes are categorized in three; for veges, for meats and for fish; this Santoku - Houchou is in the ideal shape and made to fit for all 3 different purposes by one.
It has the popular chisel grind style with short edge on the other side so it is easier to cut food in straight with clean cutting surface.
The most part of its blade is straight so it can slice veges against cutting board easily, or peal the veges in thin slices.
The blade body is thicker made than a vegetable knifes so it lasts longer and stronger against meat and soft bones to cut, but not thick as a meat knife so easier to use, the body gets thinner towards the point tip and the edge is slightly carved up so it's easier to slice in to fish meat and cut it out from thin bones.
This type of knifes are usually strong enough to cut chicken cartridges, thin bones around wing tip, fish bones, core of corns etc, but not strong enough to chop e.g. chicken thick bones, pork ribs or beef bones.
I use mostly only one of this type knife for all cooking, except some special occasions e.g. slicing a bread.

<Take care>
Because the edge is made in the chisel grind style, the edge gets dull quite often; proper way is to use the special sharping table stone, which may not be easy to find it outside of Japan.
In that case, don't use the knife sharpener for European knifes unless the knife states that is OK (some European made one do that); the most of Japanese knifes are softer than European knifes, the general sharpener in UK will just damage the edge and make it last the life of knife shorter.
Ideal way is using a back of tea or coffee cup; the one has a bit rough cut should do well.
Do this very carefully please.
Firstly sharpen the main grind side - against the edge of cup, place the edge a right-angle to the cup bottom, not totally flat parallel to the surface of the cup bottom but slightly angled just as the grind, slide the knife from bottom to top against the cup bottom. One way only. Do it few times, carefully. Do the same for the other side of edge once. Clean the knifes under running water, careful as the edge should be very sharp now.

Although above process works fine for most of general Japanese home use knifes, if you buy a real better Japanese knifes, you may find them rusts very quickly. Be aware the better knifes from proper Japanese knife makes uses high rate of carbon steel in order making the knife sharper but stronger; in the results those knifes are easier to rust. The knife must be kept dry after use all time, wash it immediately well after cutting lemons.

The sharp pint tip is usually even softer than other part; do not dry the knife in Utensil stand but lay the edge down on the aerial.

ひき肉のレタス巻き - Minced pork lettuce roll


This is my family recipe, it was my favourite dinner since I was small and today it’s my son's favourite. The picture is the meal that my son cooked because I was with cold yesterday. A bit of lazy part is to add green beans noodle, and that's optional. Otherwise it's very difficult to make it wrong. It’s nice and light meal, I usually serve this without anything else because when you dig in to this with your hands, you won’t need anything else.


Ingredients: (2-3 people)
500g minced pork
15cm bottom whiter part of leak minced
2 large slice of ginger minced 
2 medium size dried Shitake mushroom (see prep)
3 tbsp soy sauce
1 tbsp sake
2/3 Tbsp sesame oil
1 tbsp potato starch
salt & black pepper
1 large head of lettuce
1 small pack of glass noodles/green beans noodles (optional)
vegetable oil for deep fry (optional)


Preparation
1. In a small soup cup, place the dried Shitake mushrooms – stem side down, add a pinch of sugar (not included in the list of Ingredients) then pour some boiling hot water to cover the Shitake as much as they can float in the hot water. Leave it aside for about 15 min. Cut off the stems when it become enough soft.
* This is the quick way to restrain the Shitake - it is good enough when you want it for stir fry, etc. Otherwise it needs to be left in some cold water for over 1 hour - that drains better aromatic juice with complete Shitake taste.

2. Cut off the bottom stalk of the lettuce for about 0.5- 1cm, to loosen the first few leaves. Put it under running water, the stalk side up, then carefully remove the lettuce leaves one by one. Try not to break the leaves. Repeat the process until pealing all leaves. Leave it on a strainer to drain the water.

3. Chop the leak in to mince. Place the leak on a cutting board, hold the greener side of the stalk then cut a slit at the center along the leak stalk leaving but where you are holding without cutting it to pieces. Roll the stalk for 90 degree, do it again. Then make additional slits between the slits - so it will have a cut looks like an asterisk when you look the leak from the bottom. Now slice them in about 2-3mm from bottom side. Keep repeating this until all minced.

4. Chop ginger in to mince. Ginger has strings inside along with its growing direction. Unless you want to mince all the piece, you slice them in a right-angle to the string direction. Take off the first bits out (skin bits) then cut 2 of 2mm slices. Cut off the skin part, place one over another slice, then slice from one side to another to make 2mm threads. Turn them 90 degrees then cut them into cubes.

5. Once the Shitake mushroom is softened entirely until where was the stalk, then take them out from the water, squeeze them gently to drain out the liquid. On a cutting board, place them one over the other one, slice them into about 5mm threads. Turn them 90 degrees and cut them into cubes.


Method
1. Put all ingredients from the Ingredients list until salt in a bowl, following the list order. 
2. Mix them well using your hands. Leave it aside.

3. Optional step: deep frying the green beans noodles
It is nicer if you add some deep fried glass noodles, but this takes time. I do omit when I don’t have time, it is totally optional to add it or not.

3.0 Place a kitchen paper on strainer, ready another few kitchen papers aside of it.
3.1 Open the package, take the noodle out from the package, and take off the string holding the noodles together. Give some wagging to the mass and try to lose it a bit (don't need to be loosen all free, just to make it a bit loose so the oil can go into the center easier).  
3.2 Using a Chinese wok or a large deep pan heat up some vegetable oil, enough amount for deep frying the noodles (about at least 2 cups).
3.4 Wait until the oil gets enough hot. Firstly do the test: drop a small string of the noodle into the hot oil. If the heat is enough high, then the noodle should start popping to rough whiter and thicker noodles. If not, keep heating the oil until the noodle gets popped. Once the oil is enough heated then place the whole noodle mass in. Turn over the noodles in the oil few times and allow all around the noodle mass to pop. 
3.5 Once the popping stopped and see that the most of the noodles are popped, take the noodles out from the oil, keep it over the wok/pan for another 5-10 sec to drain the remaining oil out from the noodle well, then place it on the kitchen paper on the strainer. 
3.6 Using the extra 2 kitchen papers, wag the noodle and make them into loosen threads - be careful, the noodle must be very hot and some hot oil may come out! 
3.7 If the center of noodle mass remained not popped then put that remaining mass back in the hot oil and repeat the process again. 
3.8 You may find some center bits cannot pop at all - that's fine, once the noodles start to get brownish, then the noodles are fried enough anyway. You should be able to break that down to small pieces by the kitchen paper. 

4. If you've done the step 3, then take all oil out from the wok/pan to other pot, then place the pan on a hob and turn it on to high heat. Pour about 1 tbsp of oil in the wok/pan. 
If you skip the step 3, Place the Chinese wok or deep pan on a hob, turn the hob to high heat. Once the wok/pan is heated enough then pour about 3 tbsp of oil in the wok/pan. Move around the wok/pan to spread the oil all over the wok/pan. Discard 1/3 of the oil.
5. Put all the mixture of step 2 into the wok/pan. 
6. Using the turner, separate the mixture into smaller meat ball bits. Push down the mixture in the wok/pan, then cutting them through to small bits using the turner. Once the bottom side of minced pork are cooked, then using the turner, little by little turn them over roughly. Repeat separating them by the turner to small bits. If all became roughly a small bits, then stir fry until all get cooked.
7. Add the deep fried glass noodles into the wok/pan, stir fry them together for another 1 minute and done.
8. Serve the minced pork in a pot with few large spoons – the meat is nice serving in hot as well as cold depend on the weather. Serve the fresh lettuce separately. Everyone use your hands to build your own rolls.

* Additionz: I prefer to add some mayo in my roll. Chili oil is also nice if you like to have some kick. 

Monday, 20 January 2014

Japanese Cream Bread

One of what I made on the last weekend.
Othe nice recipe from Japan. I'll post the detail later.

Sunday, 19 January 2014

Japanese and Oriental ingredients: Rice vinegar

Rice vinegar

The Japanese rice vinegar has a gentle rice flavour with very light natural sweetness, light but stingy and clear sour taste. Basic one has not malted or sweetened. The clear taste of rice vinegar does not bother the food original taste.
Using the same basic rice vinegar, there are so many varieties of way to marinate ingredients; the vinegar is seasoned differently per the marinating ingredients, to suite the ingredients its taste.
For example, the vinegar used for sushi rice is not plane rice vinegar, but the one seasoned by sugar and salt. By the portion of sugar and soy source mixed with vinegar makes the basic few varieties. Mixing with flutes juice like lemon, or flutes meat like ume (salted plum) are the another popular style. 
Marinating food is one of very popular way to preserve food and kill bacteria, which is easier to grow under the Japanese high heat & humidity summer condition.

<Example products you can find in UK>
I have to say, I use only Mizkan brand. I never could accept any other makers taste as this is my family taste. But I think I'm not the only one.

Daily use: Mizkan Distilled White Vinegar
http://shop.waiyeehong.com/food-ingredients/sauces-oils/vinegars/distilled-white-vinegar
Honestly this type has lesser flavour but really cheaper. Yet the stingy vinegar sour taste gets much gentle than the western distilled white vinegars. For the heated menu like Sweet and Sour pork, this works well.

 Good: Mizkan Rice Vinegar (Most of Japanese grocery store has this product)

Has richer rice flavour, slightly sweeter and lesser stingy sour taste than above. Usually cooked with sugar and other ingredients for a very short period to control the stingy sour taste even more.
ASDA carries equivalent product:
http://groceries.asda.com/asda-webstore/landing/home.shtml#!product/57596457


Variety: Mizkan Sushi-zu (Seasoned vinegar/Sushi vinegar)
https://www.facebook.com/pages/Japanese-Oriental-Food-Shop-Mai-Doh/168054836579122

You can make your own Sushi-zu from above regular rice vinegar, but this is very convenient for daily use.
It has been seasoned by sugar and salt, and has lesser stingy sourness than above.
If you are looking for the rice vinegar for general salad, this is the one you like to buy.
Lately Tesco start to carry the next product:

Variety: Mizkan Powdered Sushi Vinegar Mix
http://www.tesco.com/groceries/Product/Details/?id=276785990
If you are novice making sushi rice, this powder style is easier to make sushi rice evenly.

For cooking
Commonly used for marinating vegetable, fish and sea food. Cooking meat with vinegar softens the meats. The sushi rice vinegar makes very simple and light tasting salad dressing. 

Other use
Lately vinegar is more likely to be used for cleaning household, just like the lemon juice.